


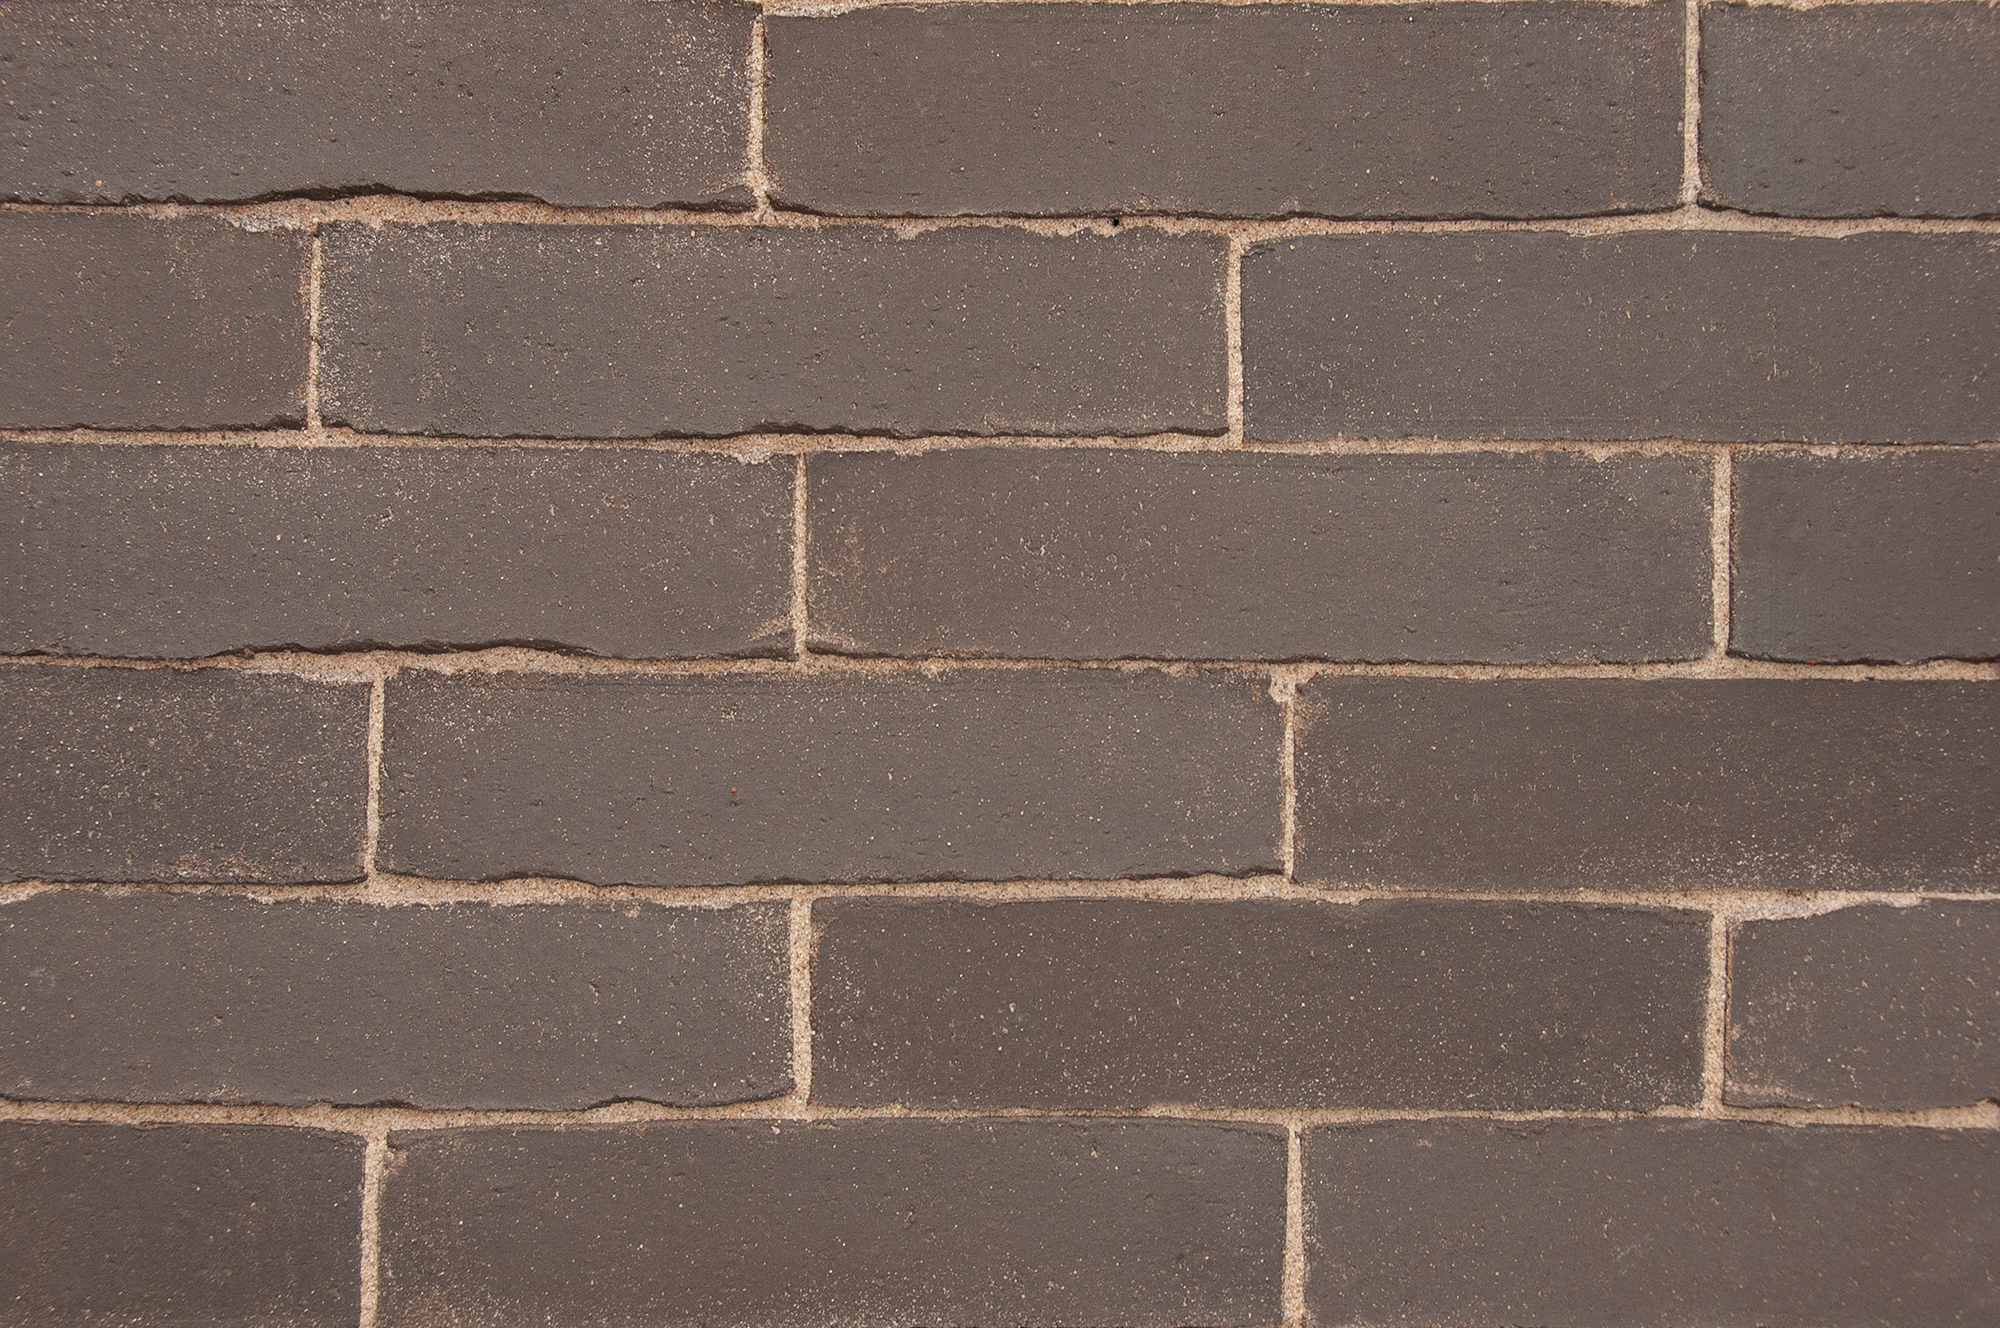
Clay paversCarbon
Technical data sheets
- Color description
- Black brown
- Finish
Unsanded.
- Manufacturing dimensions (L x W x H)
- ca. 212x50x70 mm (LxWxH)
- Quantity / m² with a traditional joint
- 91
Carbon
Dark unsanded clay paver
This clay paver with subtle shading has been rated as class A. It also has a low level of water absorption and is highly frost-resistant. Its long lifespan and ecological ECO-7-size format make this unsanded paver a high-grade paving material.


How to Install ?
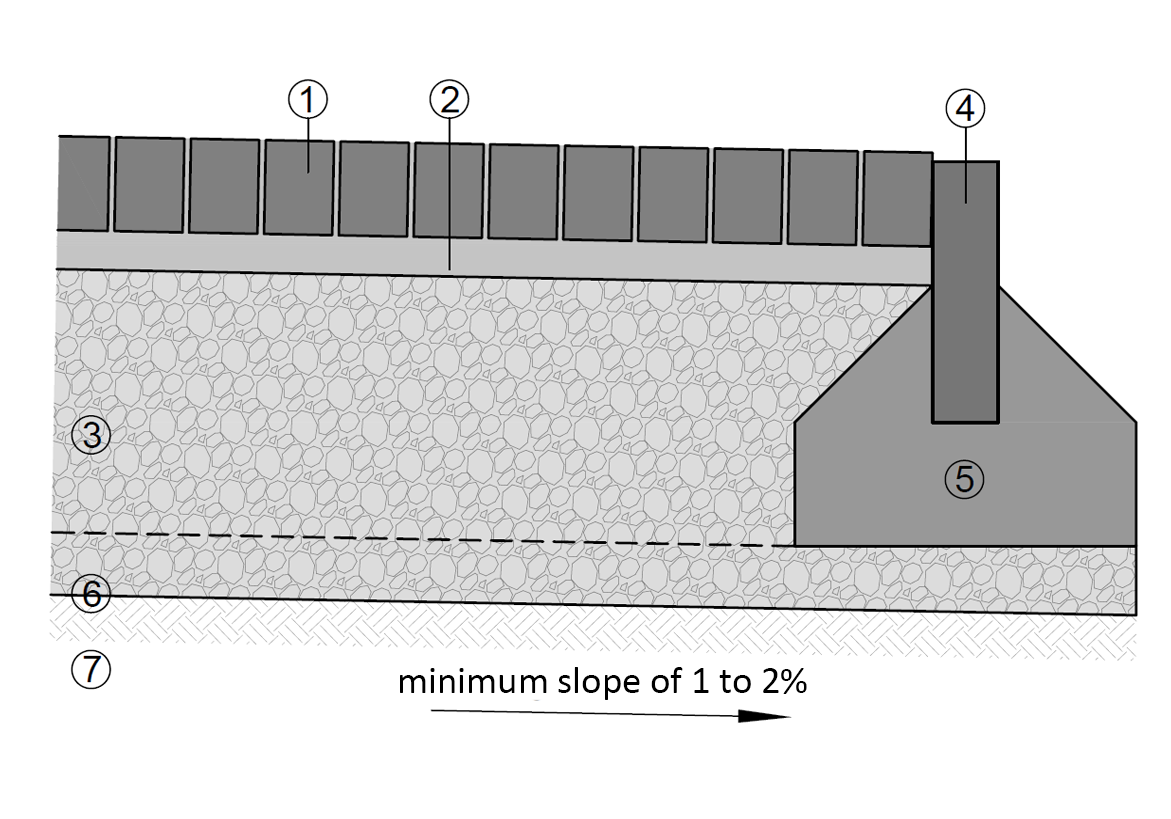
Construction of a paved surface using clay pavers
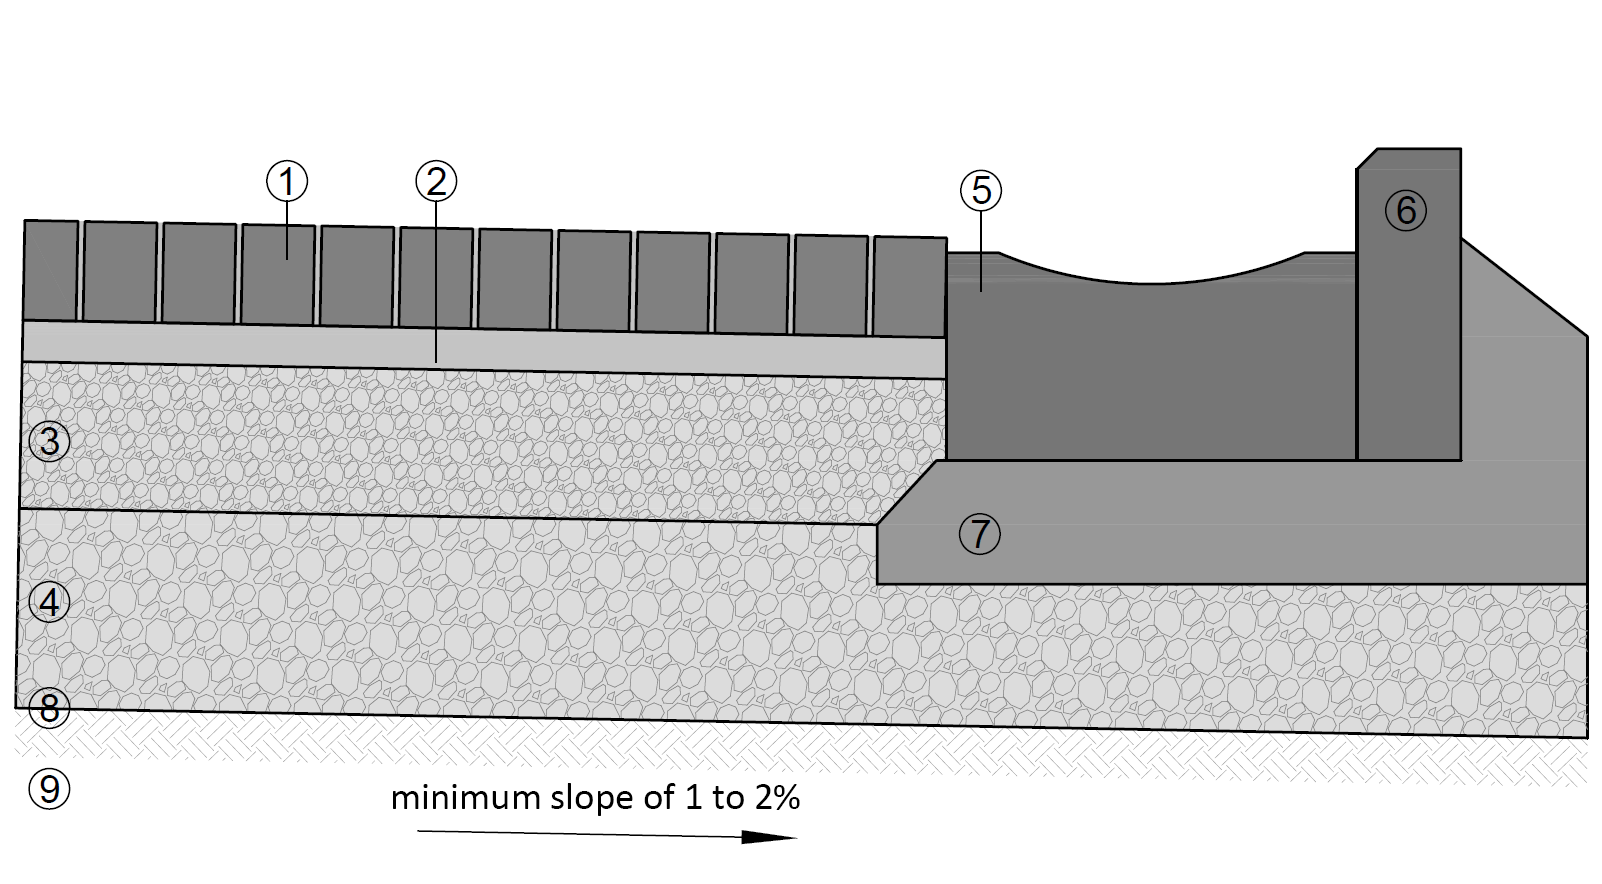
Quality paved surfaces consist of?
1. clay pavers incl. joint filling
2. bedding course
3. foundations and any sub-foundations
4. edging
5. support
6. geotextile if applicable
7. substrate
Preparing the substrate
What should you pay attention to before you start paving?
Any loose soil should be removed so that work can start on solid ground which is sufficiently water-permeable.
Depending on the substrate, a non-woven geotextile should be installed in order to prevent fine material in the sub-foundations from rising up. This is definitely recommended in the case of clayey or loamy soil.
How do you provide proper drainage?
A minimum slope of 1 to 2% is recommended. The water should always run away from the building. If the water is collected by a (slotted) gulley, then that gulley is to be cleaned out thoroughly at least once a year in order to ensure that proper drainage is maintained.
When are sub-foundations required?
It will depend on the stability, quality and compactness of the substrate as to whether or not sub-foundations need to be laid. The excavated thickness of loose soil can be backfilled with crushed stone which is compacted. So the actual foundation works will start with a solid and water-permeable sub-foundation layer in order to avoid subsequent subsidence.
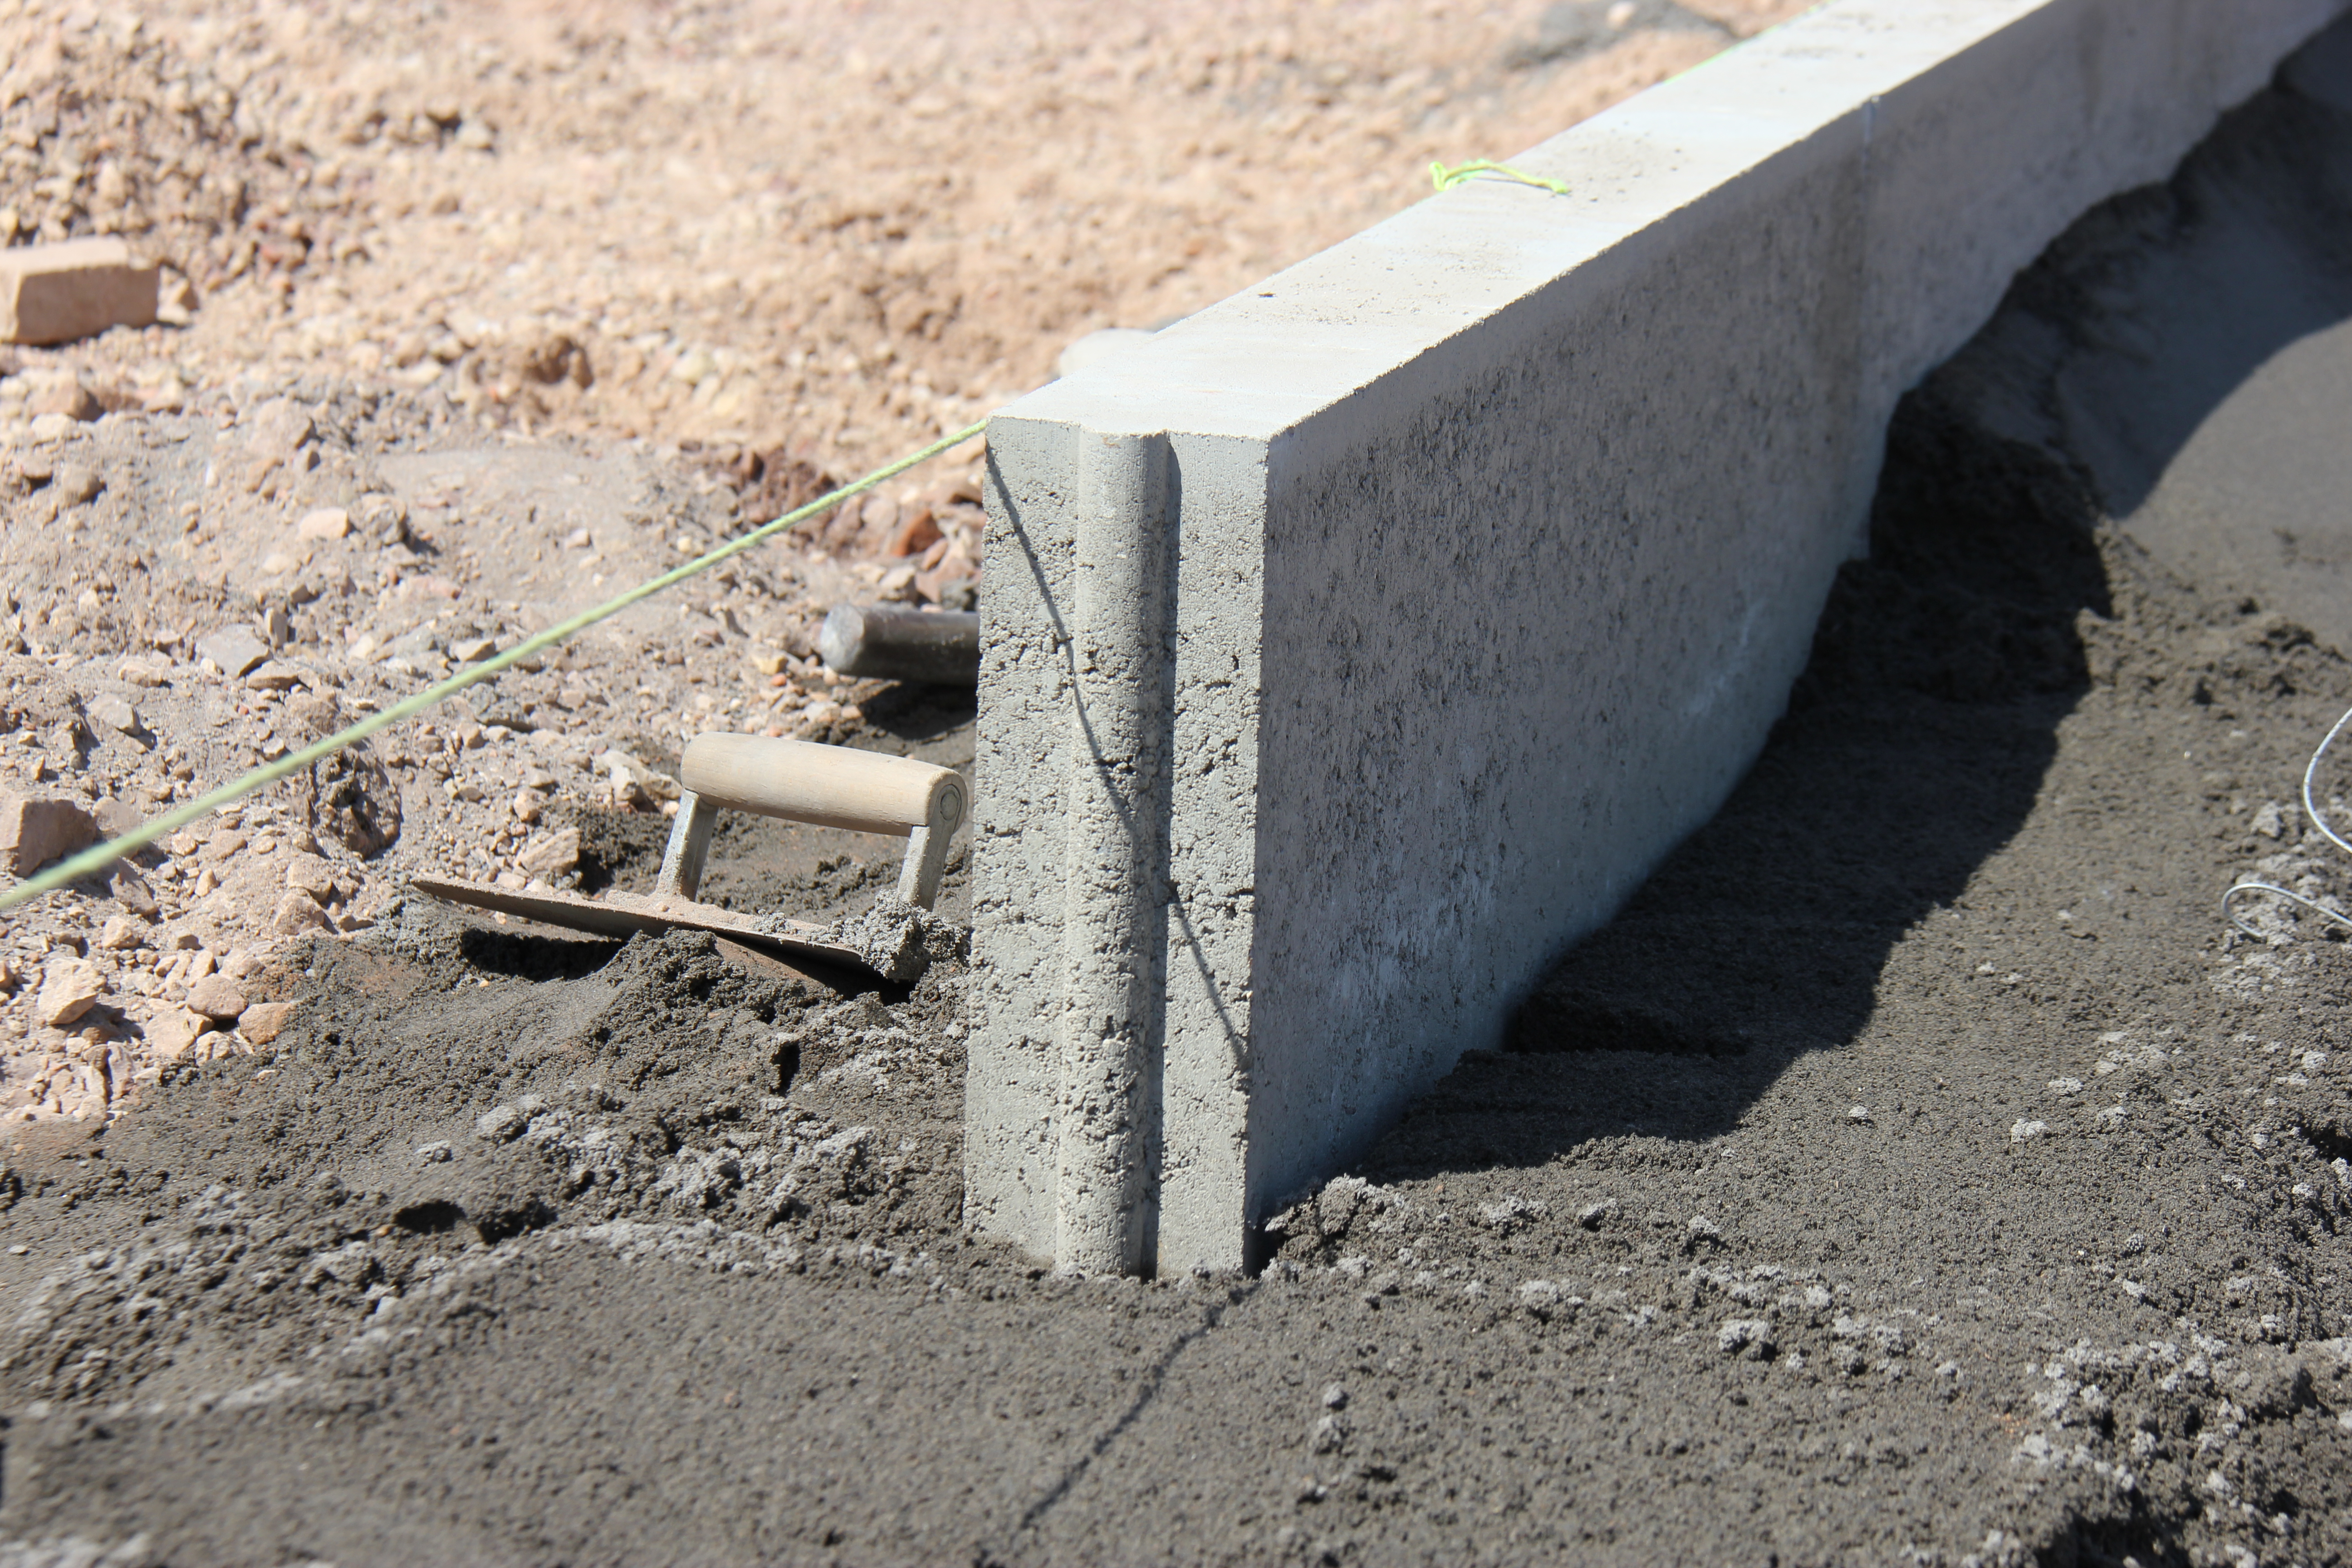
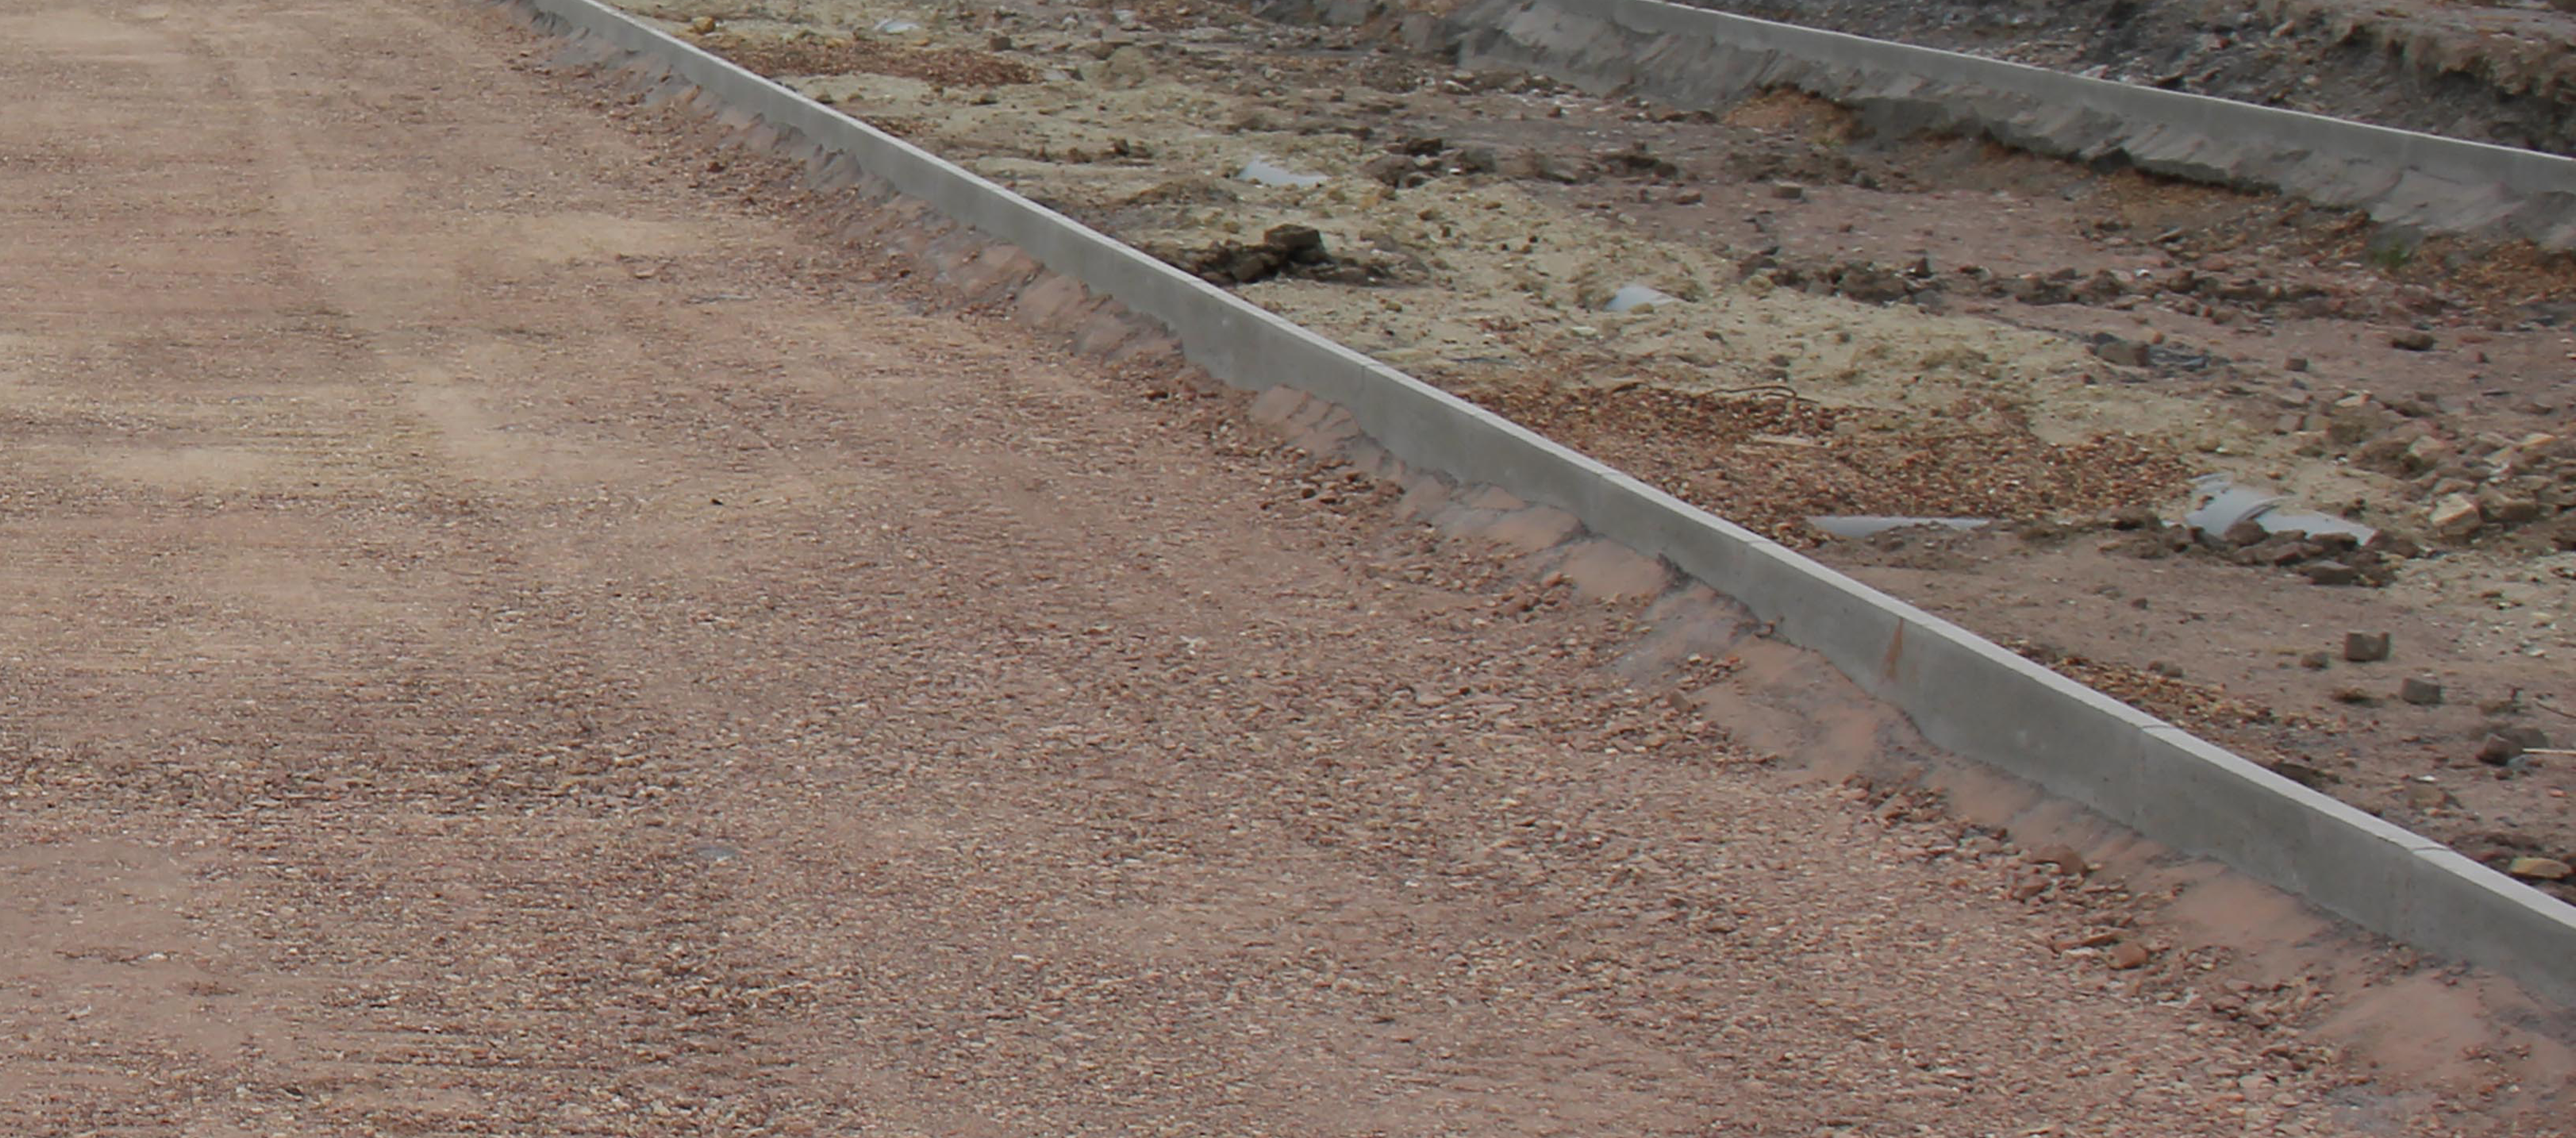
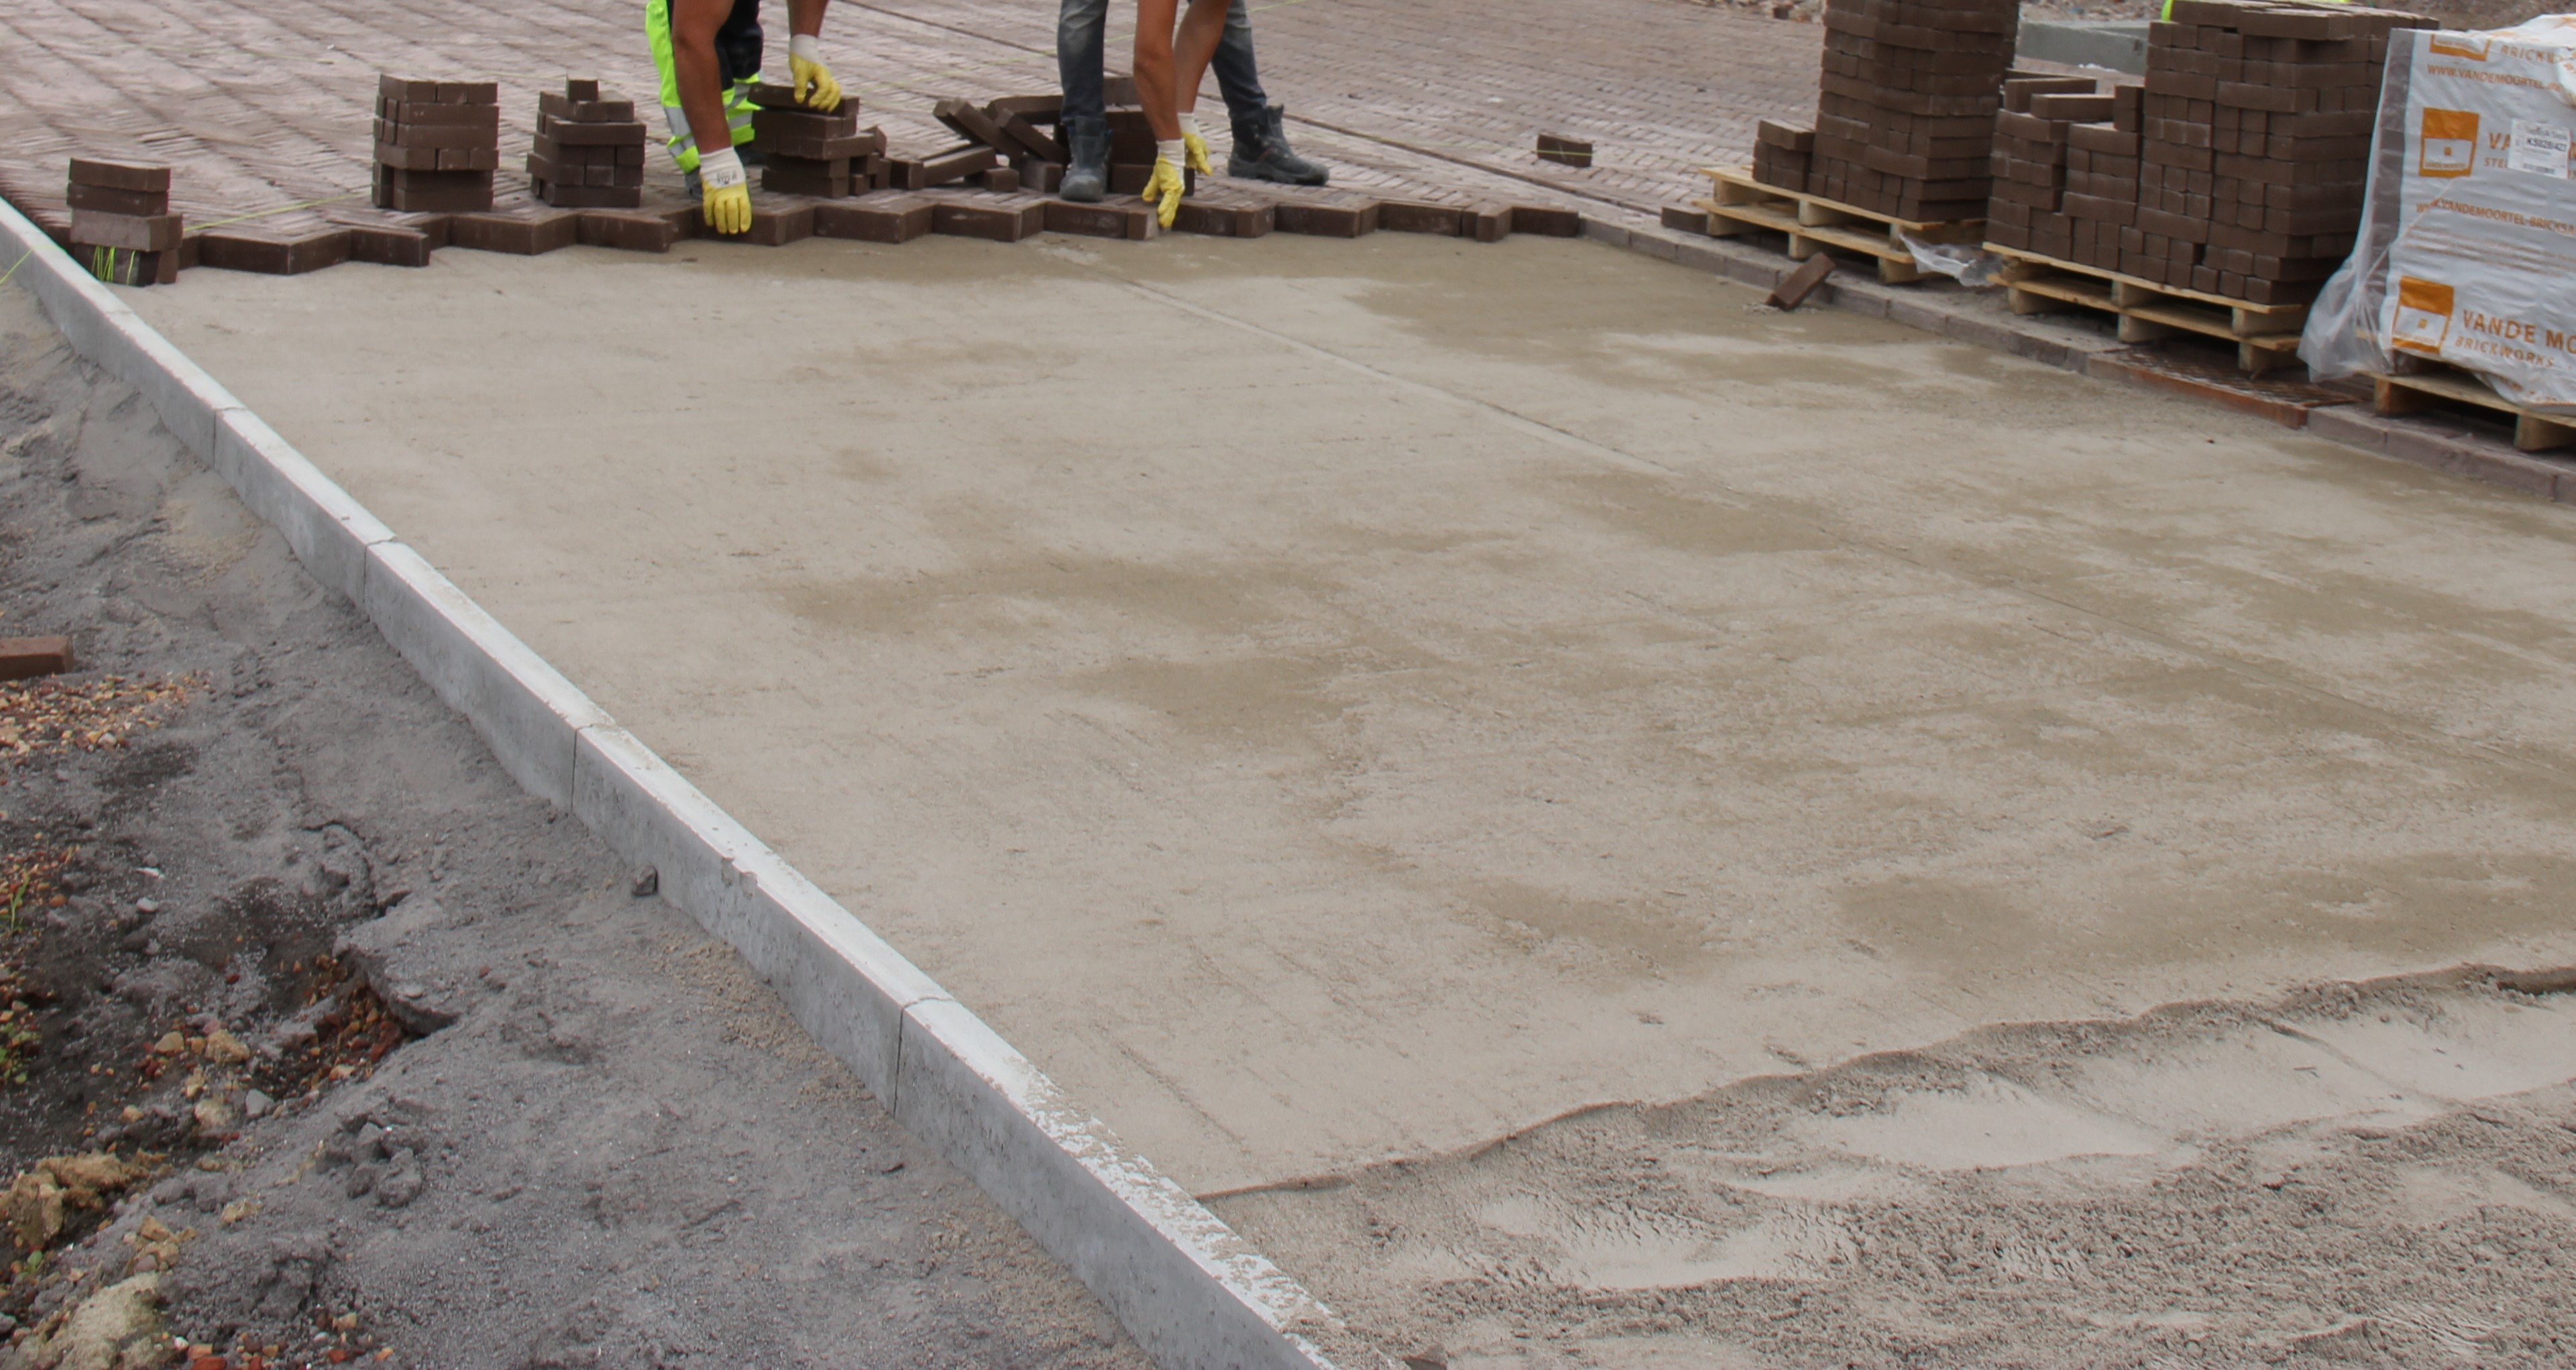
Install solid edging for durable paving
How does solid edging keep Clay Pavers in place?
The paving should be prevented from moving by installing edging along the side of the pavers. The edging is installed before the foundations are laid.
Edging can vary from single kerbstones (a row of clay pavers perpendicular to the bond) supported by sand cement for terraces and footpaths to prefabricated linear concrete elements for driveways and parking areas. Other linear materials can also be used but the edging should always be adequately supported using sand cement.
Besides the edging, it is recommended to install one or two stretcher courses – especially with diagonal bonds – so that cut adjustment pieces never lie directly against the edging.
Allow the edging support to set first of all before laying the foundations.
A good foundation provides bearing capacity and can withstand trafficload
What type of foundations should I provide?
The thickness of, and the material used for, the foundations will be determined by the load to be expected
20 to 25 cm of crushed stone, which is applied in 2 layers and compacted or a thickness of 15 cm of sand cement with 150-200 kg of cement/m³ of sand is sufficient for most applications. Use a fraction of 8/20 or 8/32 for the bottom layer and a fraction of 2/8 for the top layer of crushed stone foundations, for example. A construction with crushed stone foundations is water-permeable.
A minimum foundation thickness of 10 cm is sufficient for garden paths which are not going to be subjected to traffic.
Paving layer or laying bed for levelled paving
Which materials can be used for a paving layer for clay pavers?
A cleaner type of sand (preferably hard of sharp sand such as crushed sand or split) or sand cement, preferably mixed on site in small quantities, can be used for the paving layer. A paving layer in sand cement is always combined with sand cement foundations. Sand cement is always freshly mixed. When applying a paving layer with a fine fraction in conjunction with foundations in a coarse fraction, the application of a geotextile is recommended.
We recommend that you always use compositions with a limited lime and salt content in order to prevent efflorescence on pavers. That is certainly the case in covered zones where no natural cleaning of the materials can be carried out.
Levelling of the paving layer
Before laying the clay pavers, the paving layer is spread evenly and levelled using a screed paver board. The paving layer is not compacted together with the clay pavers until it has been laid. The thickness of the paving layer, after compacting by vibrating, is to be approximately 30 mm.
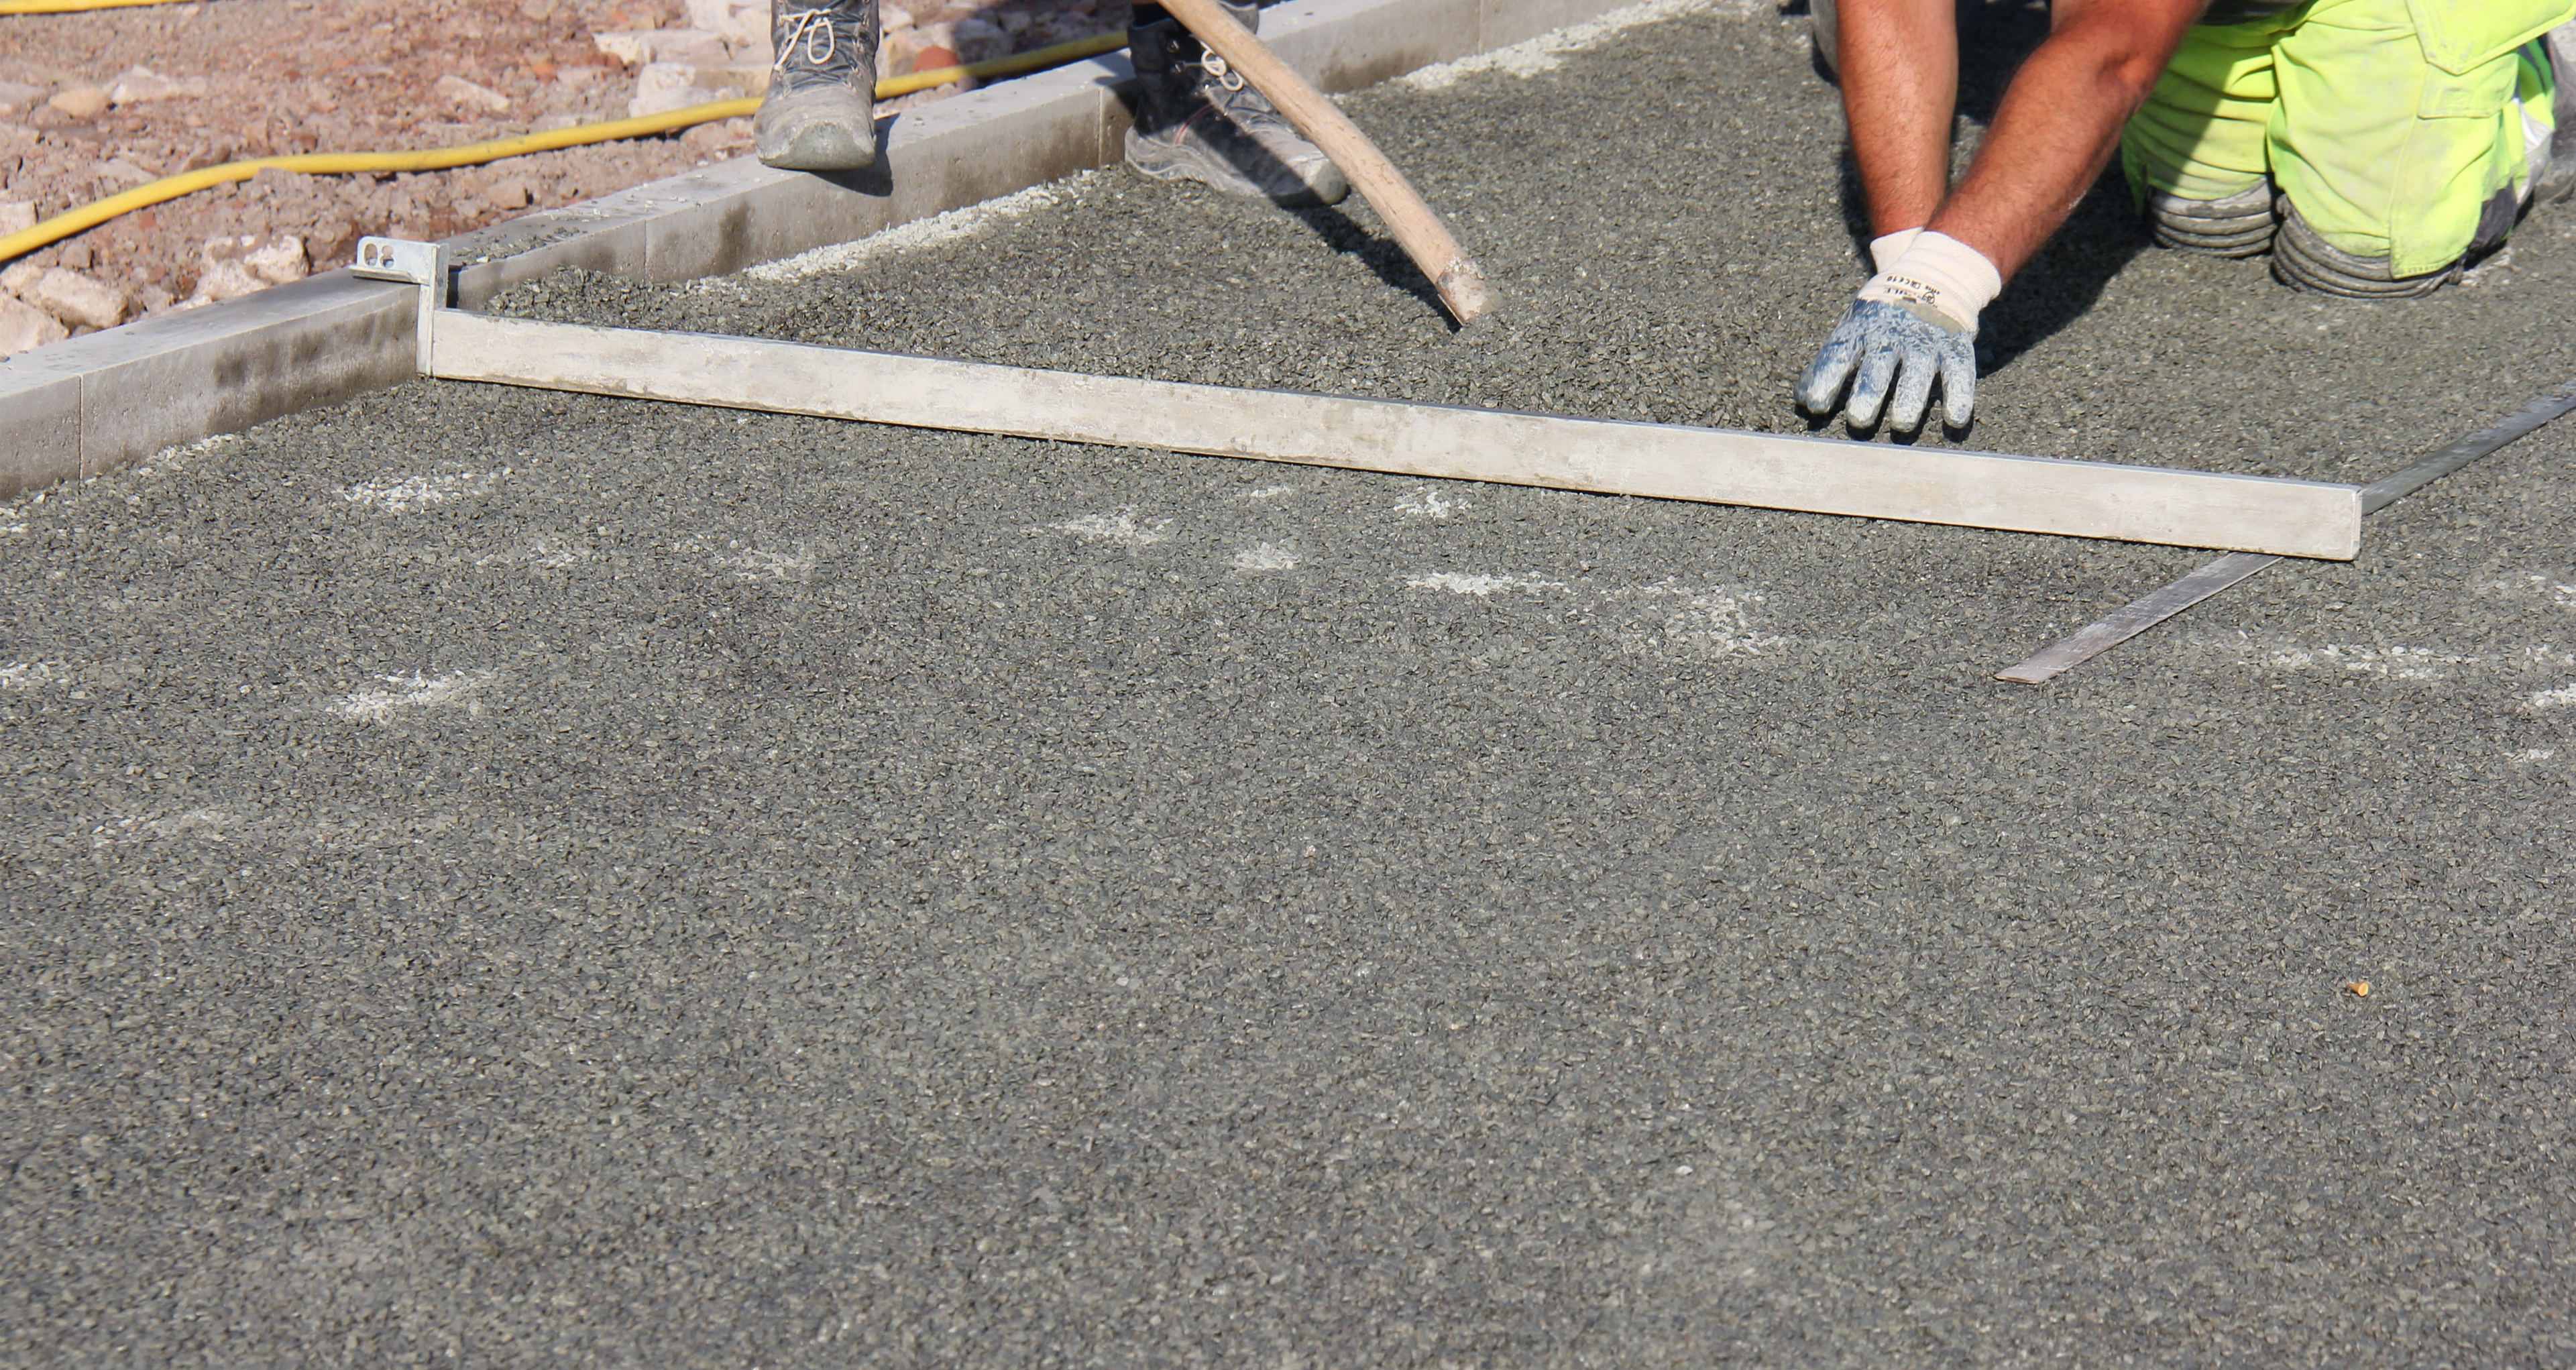
Laying the pavers
How do I get the best result with clay pavers?
Setting out the paving
It is advisable to lay out the bond beforehand in order to achieve an attractive edge finish without any undesirably small cut pieces. The task of setting out is carried out by laying out the clay pavers beforehand, taking account of the actual formats of the pavers delivered to site. Use a mix of clay pavers taken from a minimum of 5 packs layer by layer from the various top, middle and bottom layers on the pallet.
Mixing pavers from different packs
Clay pavers are a natural product so that slight variations in colour and dimensions may occur. For an attractive mix of colour nuances, the pavers are to be consistently taken from 5 different packs one by one and mixed appropriately while laying.
Laying the pavers
The clay pavers are placed loose against each other with a minimum joint (2 to 3 mm) by means of the click & drop method. By first tapping the pavers together and then lowering them onto the paving layer, the correct joint thickness is automatically achieved and the paving layer remains untouched. If necessary, a slightly wider joint can be used from time to time in order to maintain the bond. Laying the clay pavers so that they are pressed against each other is strongly advised against in order to avoid edge damage.
The pavers are laid on edge, always with the sanded side laid against the non-sanded side. Drummed clay pavers are to be laid with the least damaged stretcher side facing upwards.
Keeping to the bond
In order to keep to the line of the chosen bond when laying the pavers, a string line is used at regular intervals. Before sanding/sweeping in, the bond is corrected again where necessary and adjusted using a fine rod or fine spade.
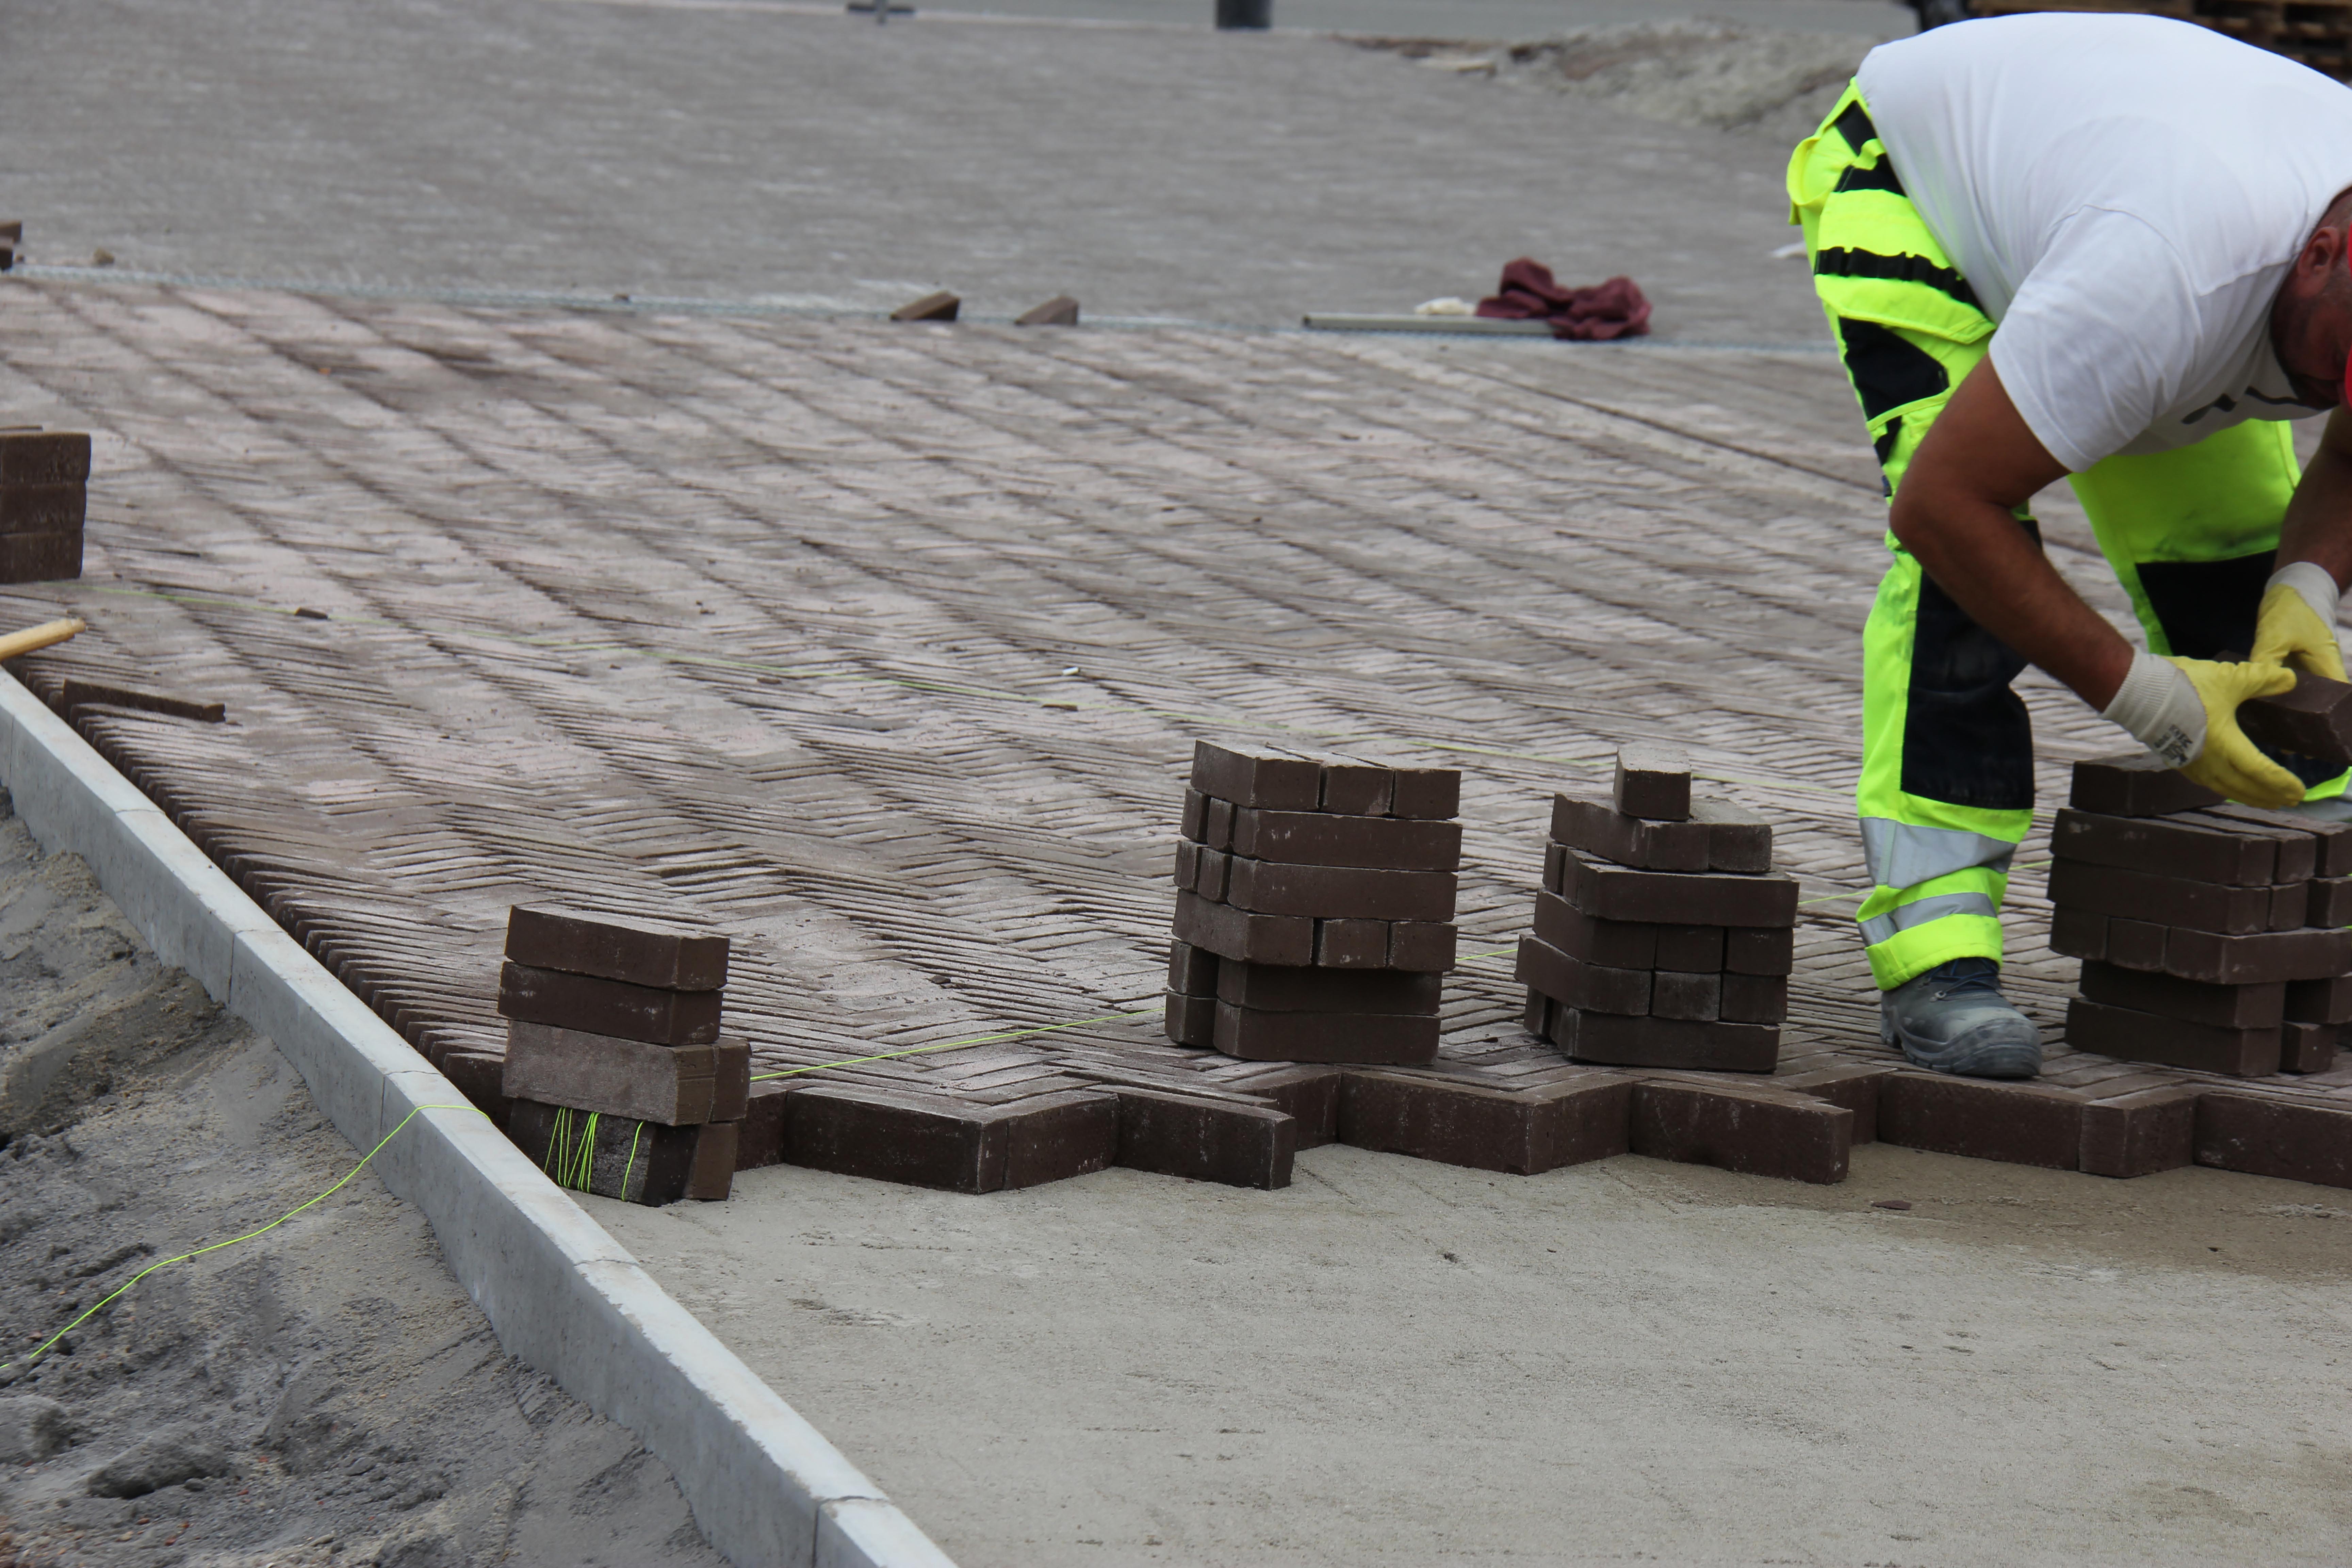
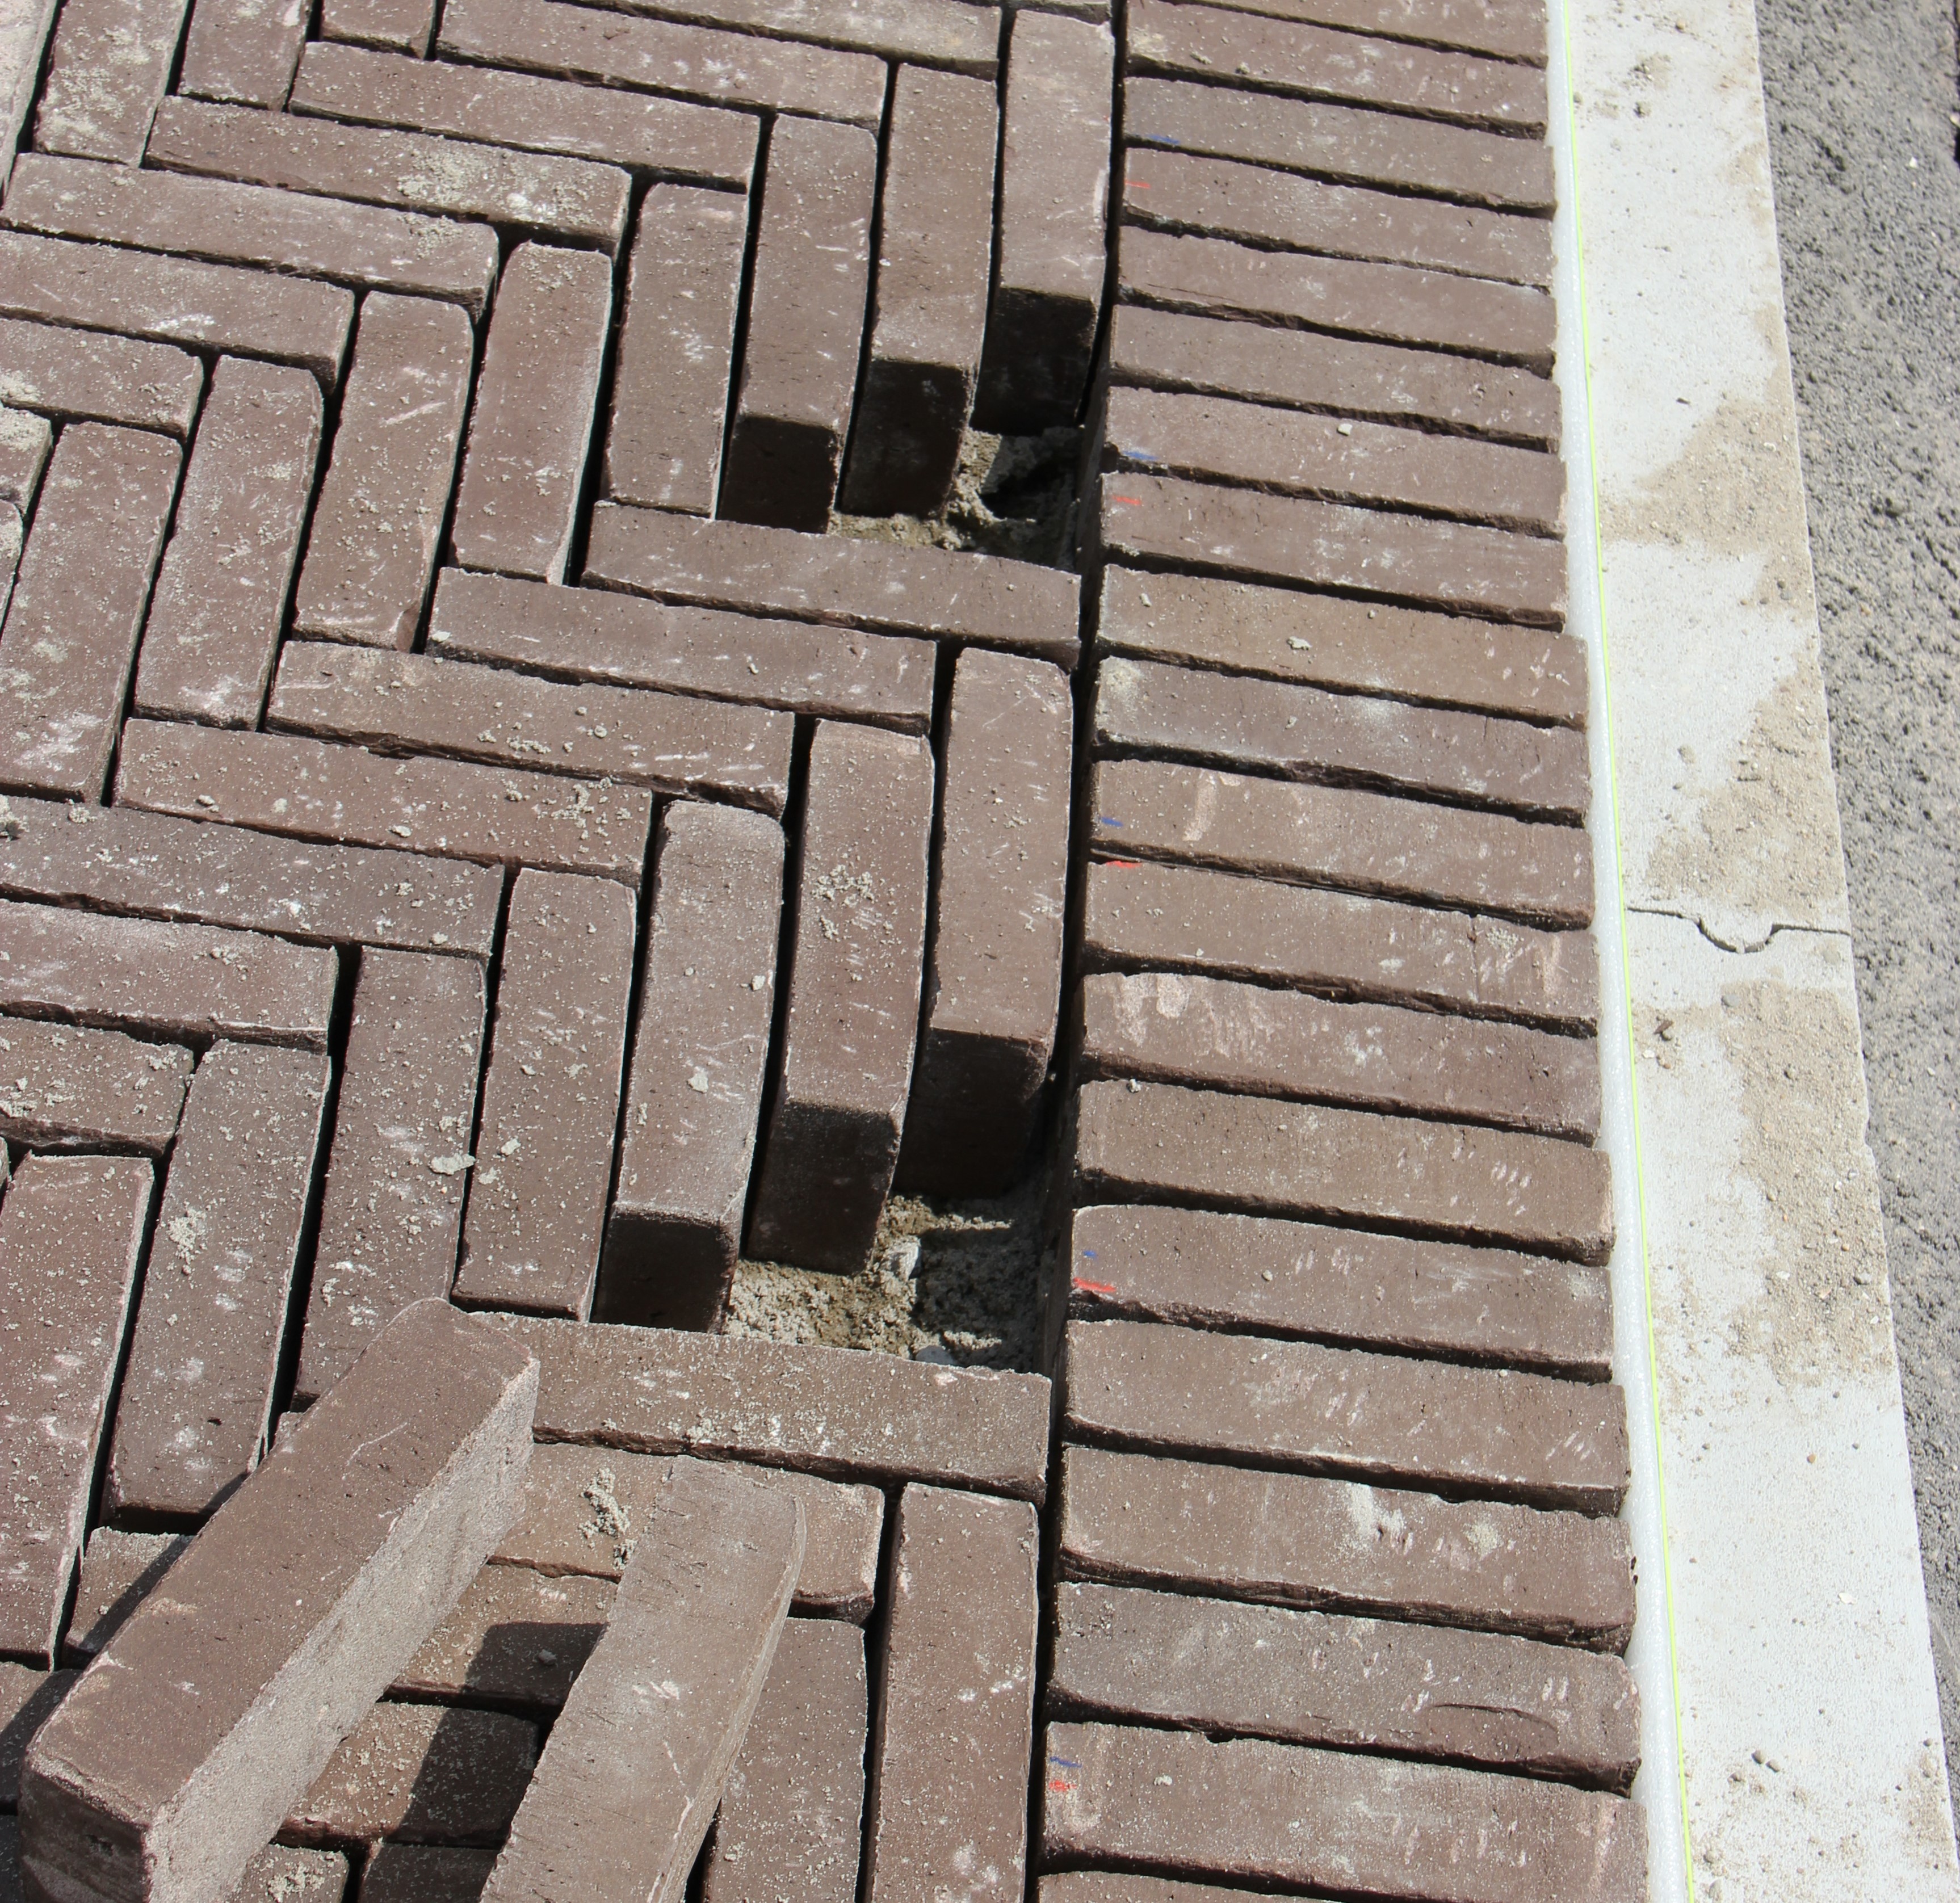
Cutting pavers
When creating the bonds, grinding will need to be carried out in order to cut the adjustment pieces required. During the laying of the pavers, the filling with adjustment pieces is carried out at the end. Use the least dimensionally stable clay pavers for this. Adjustment pieces smaller than 1/3 of a brick for random bond and 1/4 of a brick for elbow or angled herringbone bond should be avoided. Pieces which are too small are not only a nuisance but also less strong.
Embedding and vibration
How to finish the paving before use?
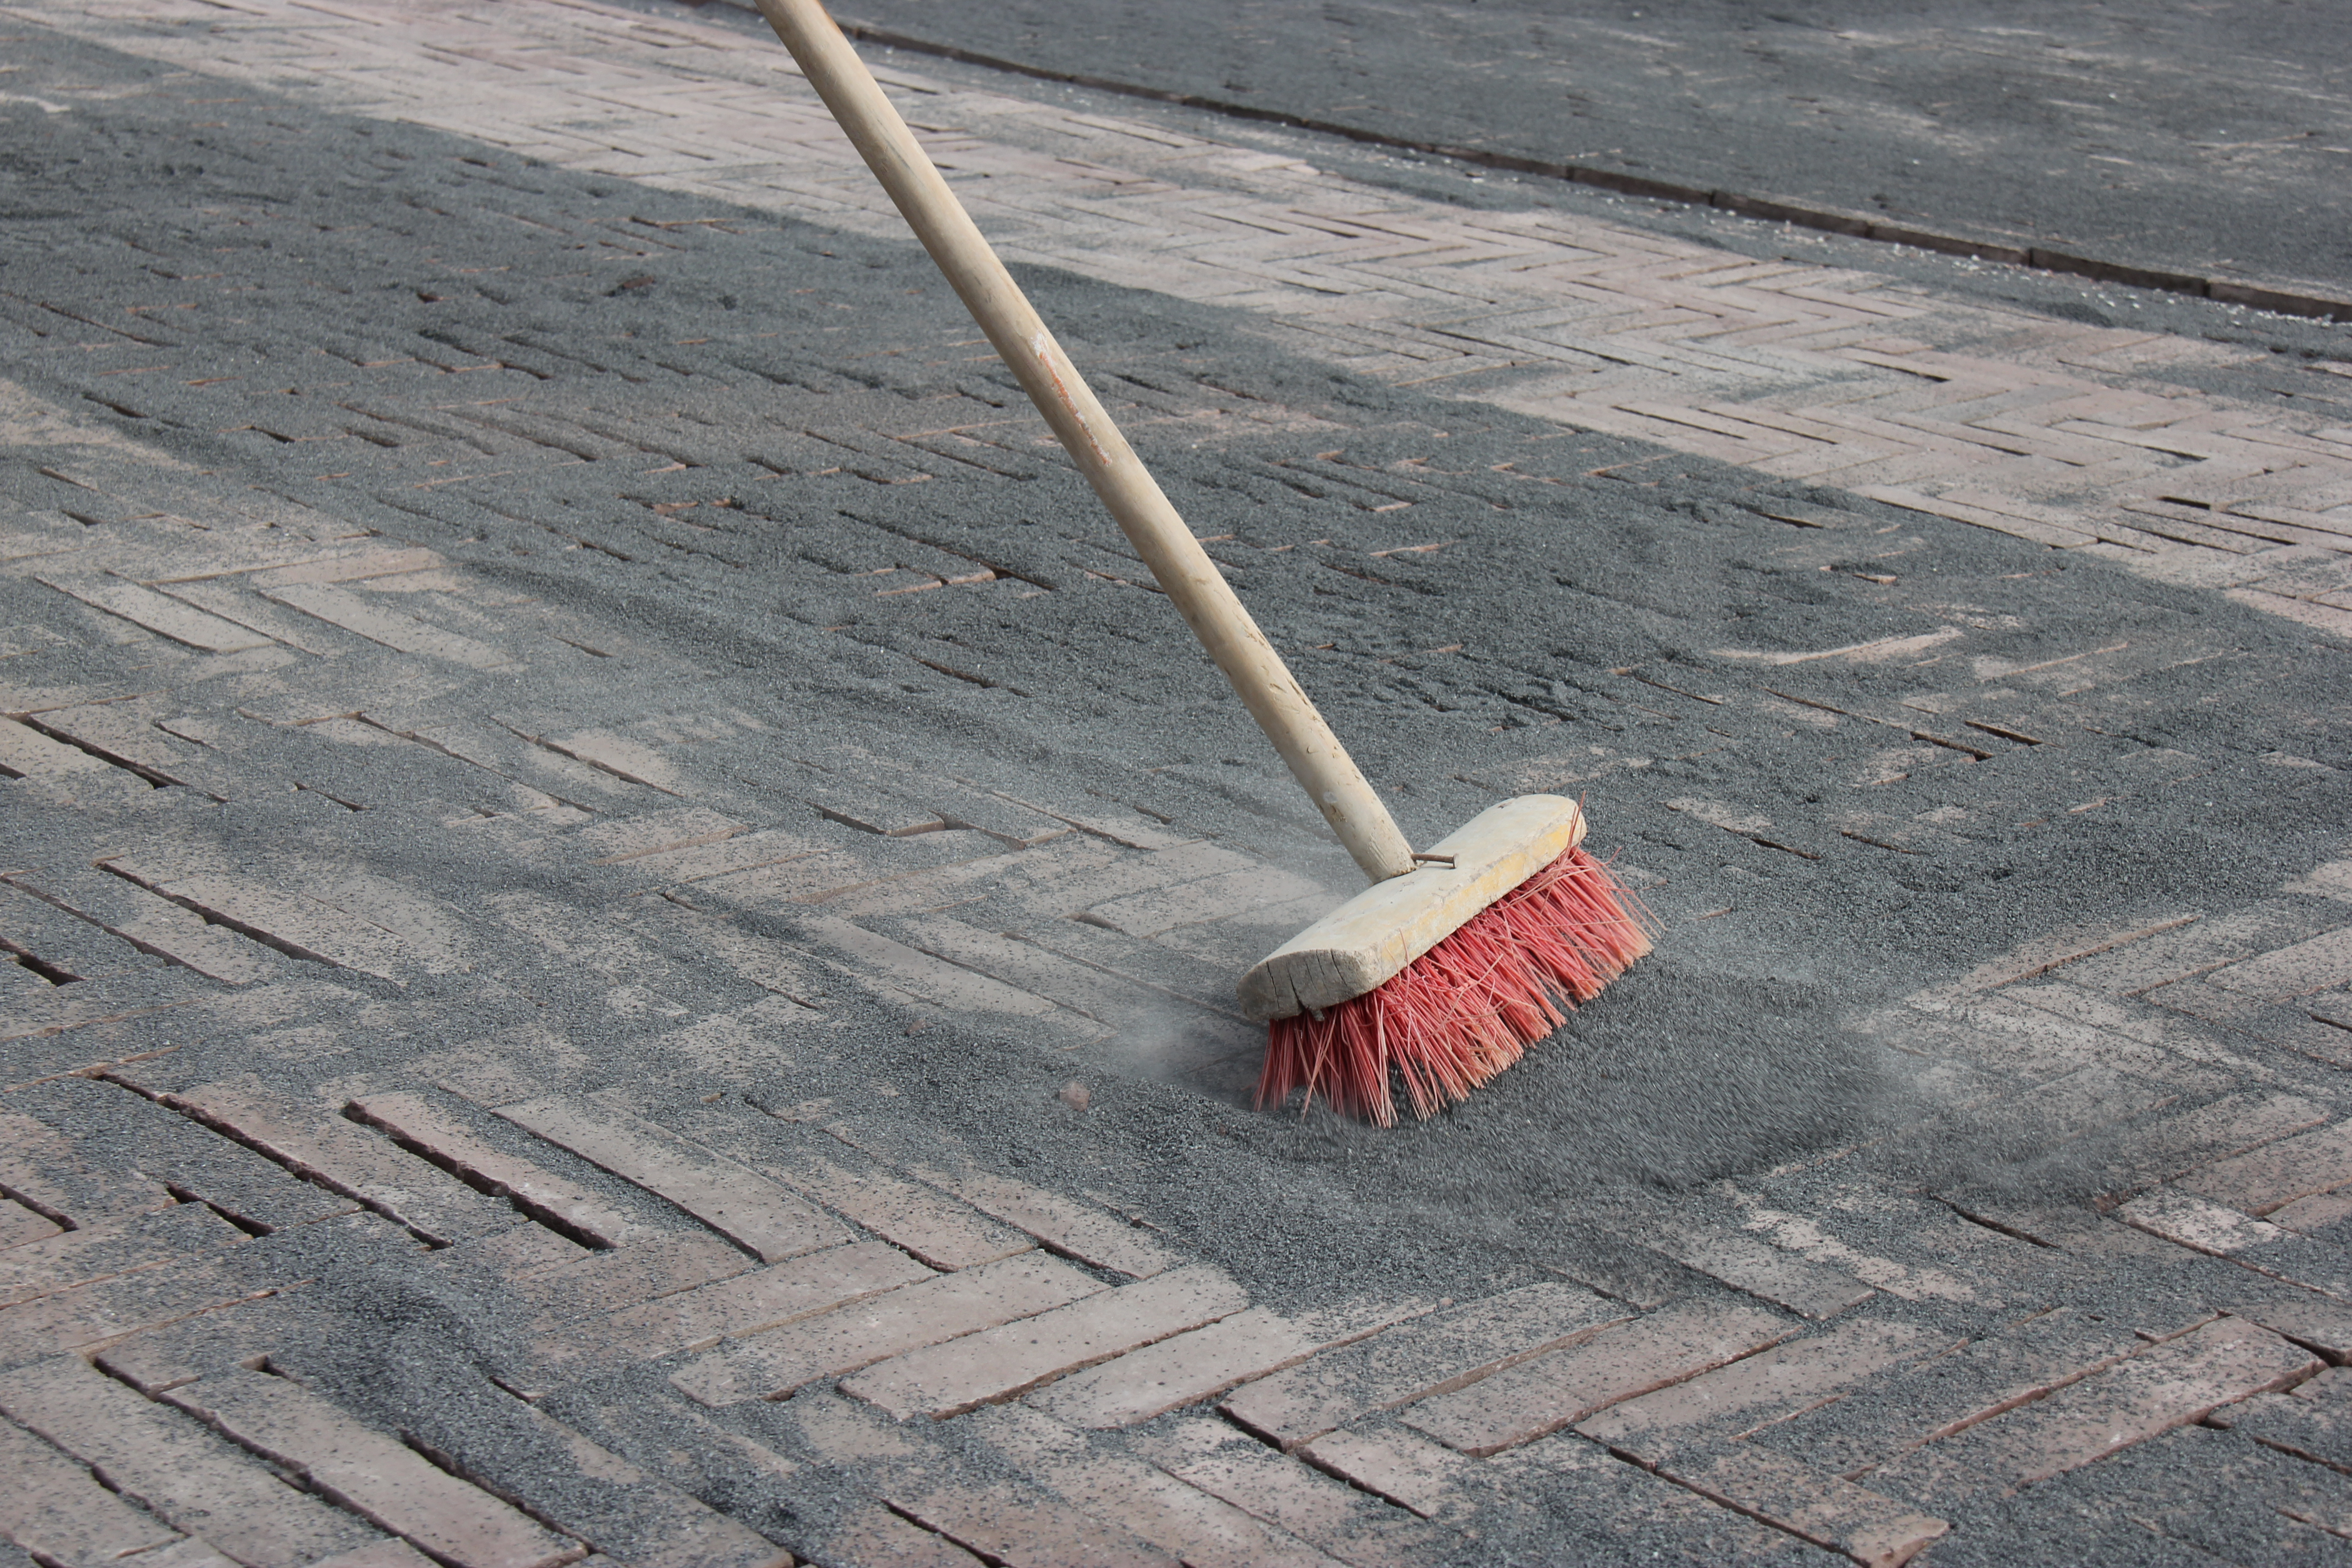
Initial sweeping in of the paving
Before vibrating the paving, the clay pavers are covered with a layer of jointing sand, e.g. split sand consisting of porphyry, basalt or Rhine sand. The optimum grain size for jointing sand is 1/2 mm. If a smaller grain size of 0/2 is used, then the fine fraction content (dust) should be restricted to less than 10% fine solids < 0.063 mm. This sand is applied until the clay pavers are stable and seated firmly so that they can no longer press against each other during vibration.
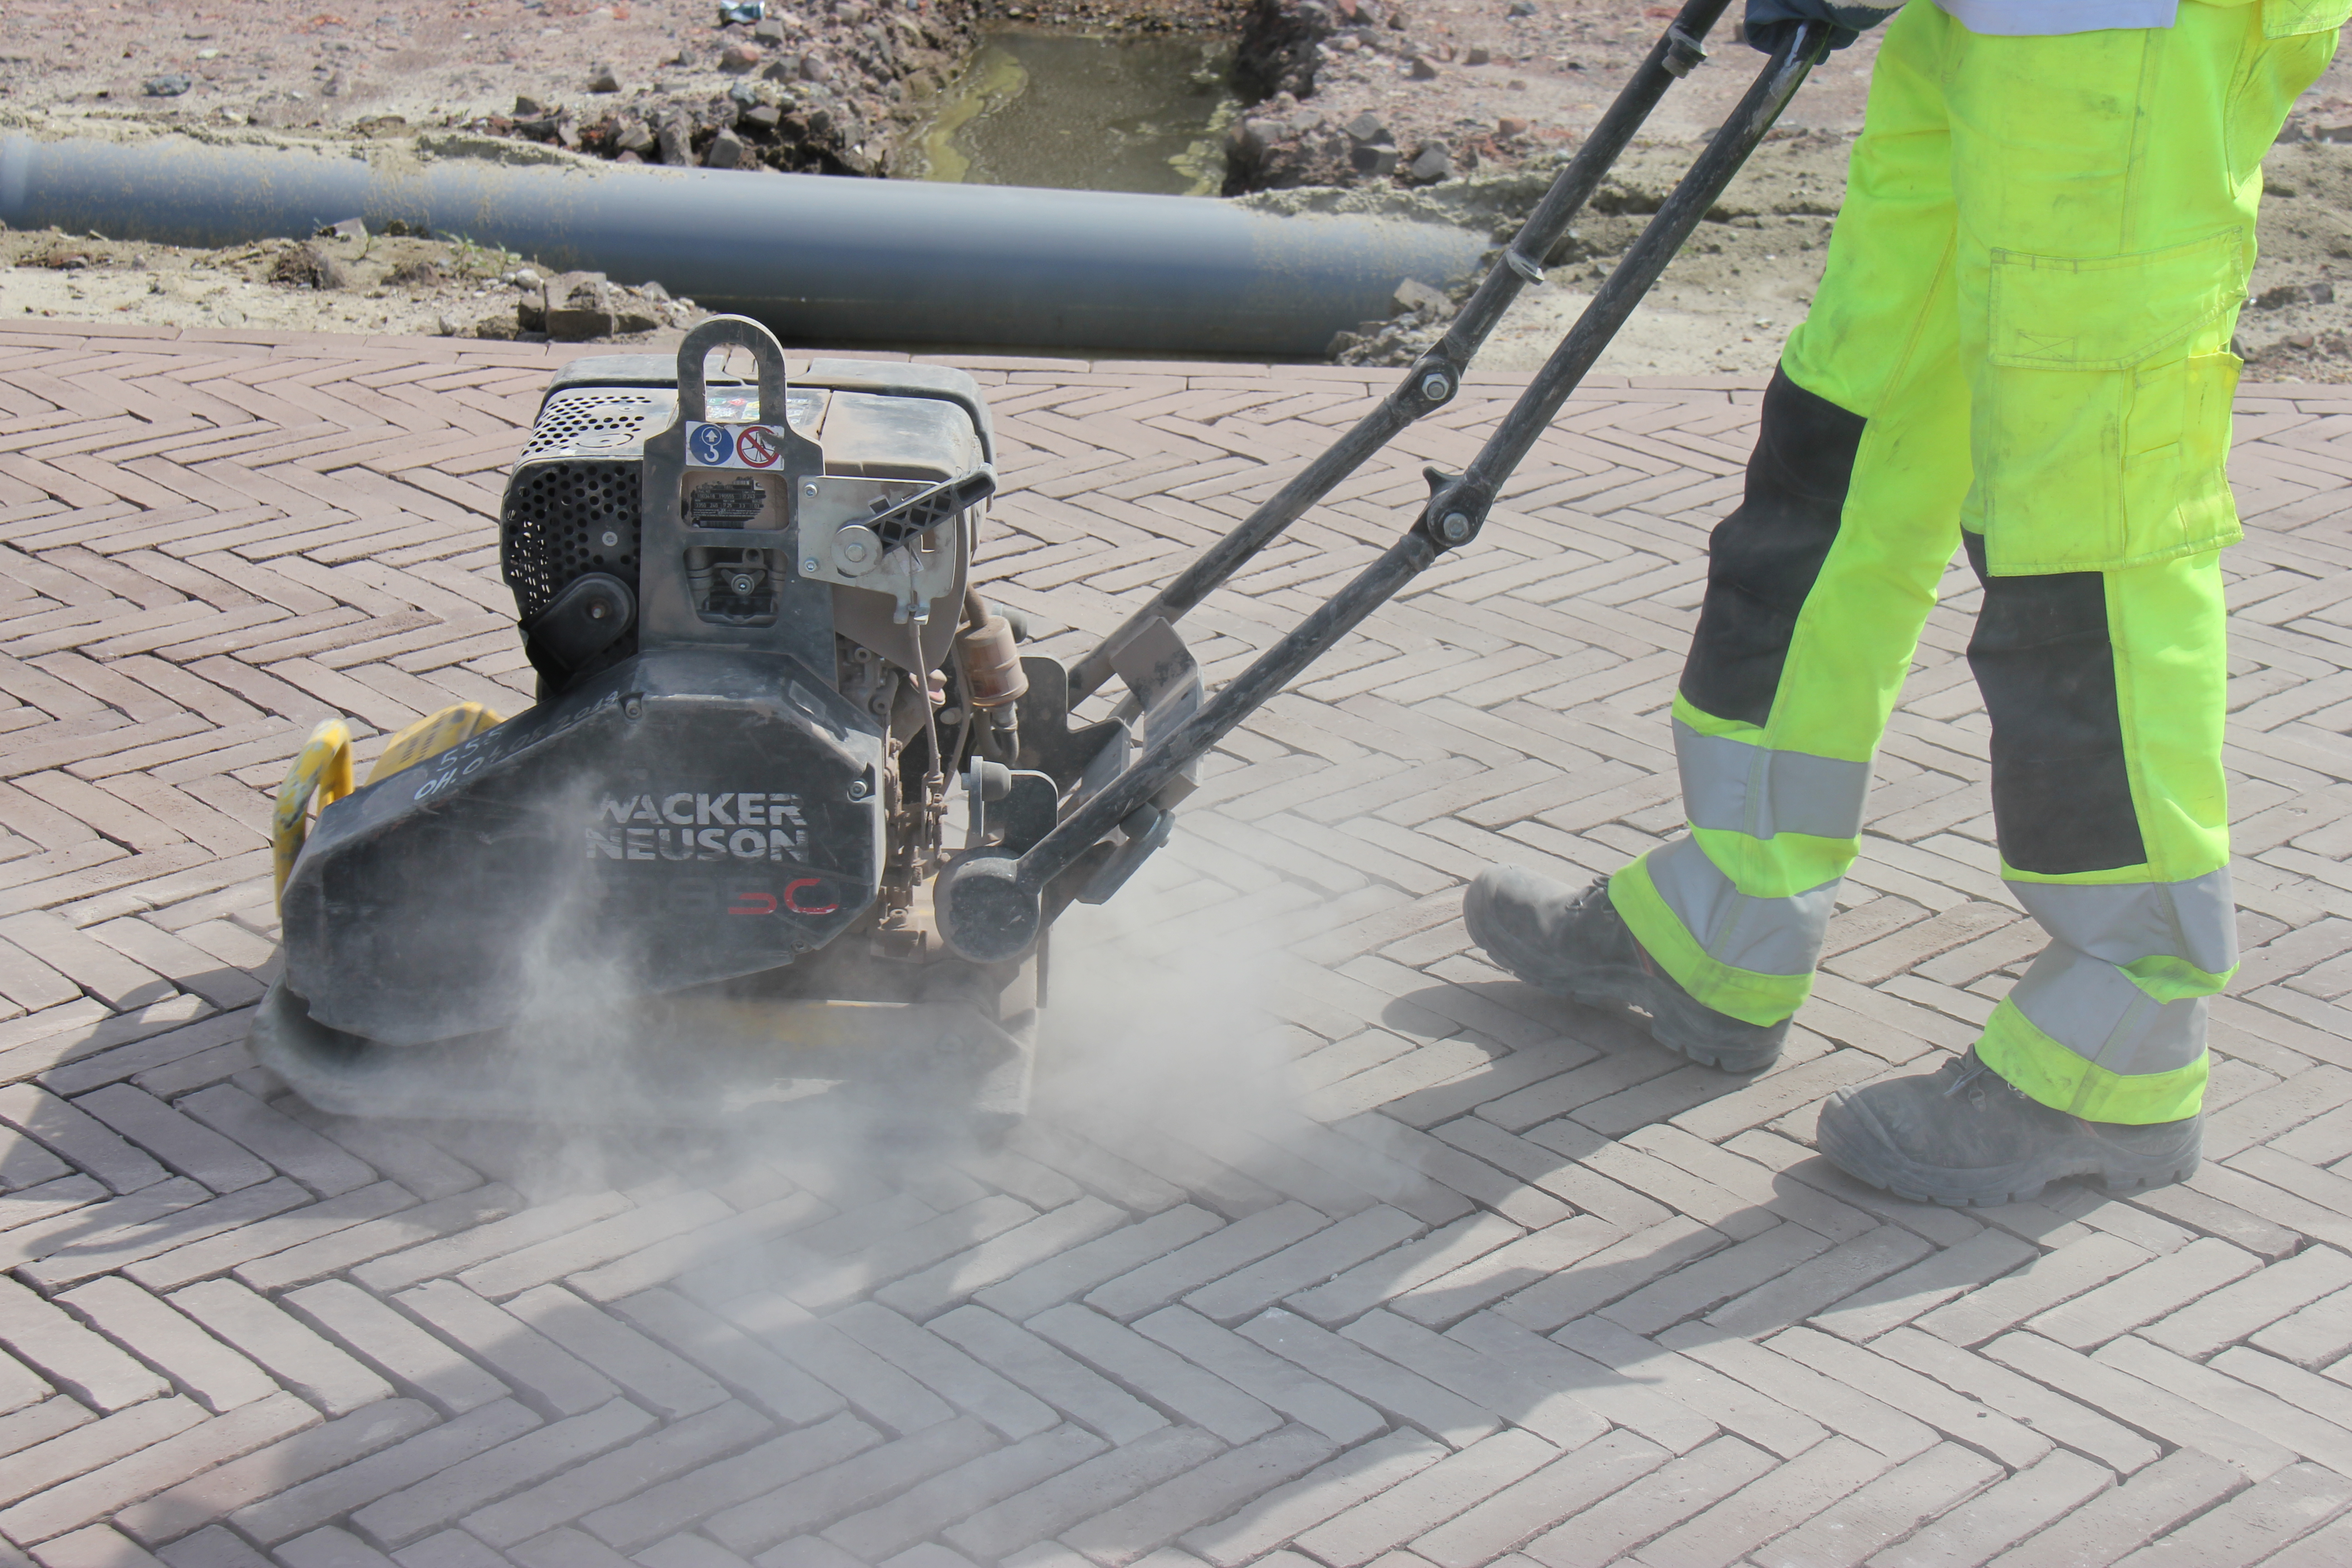
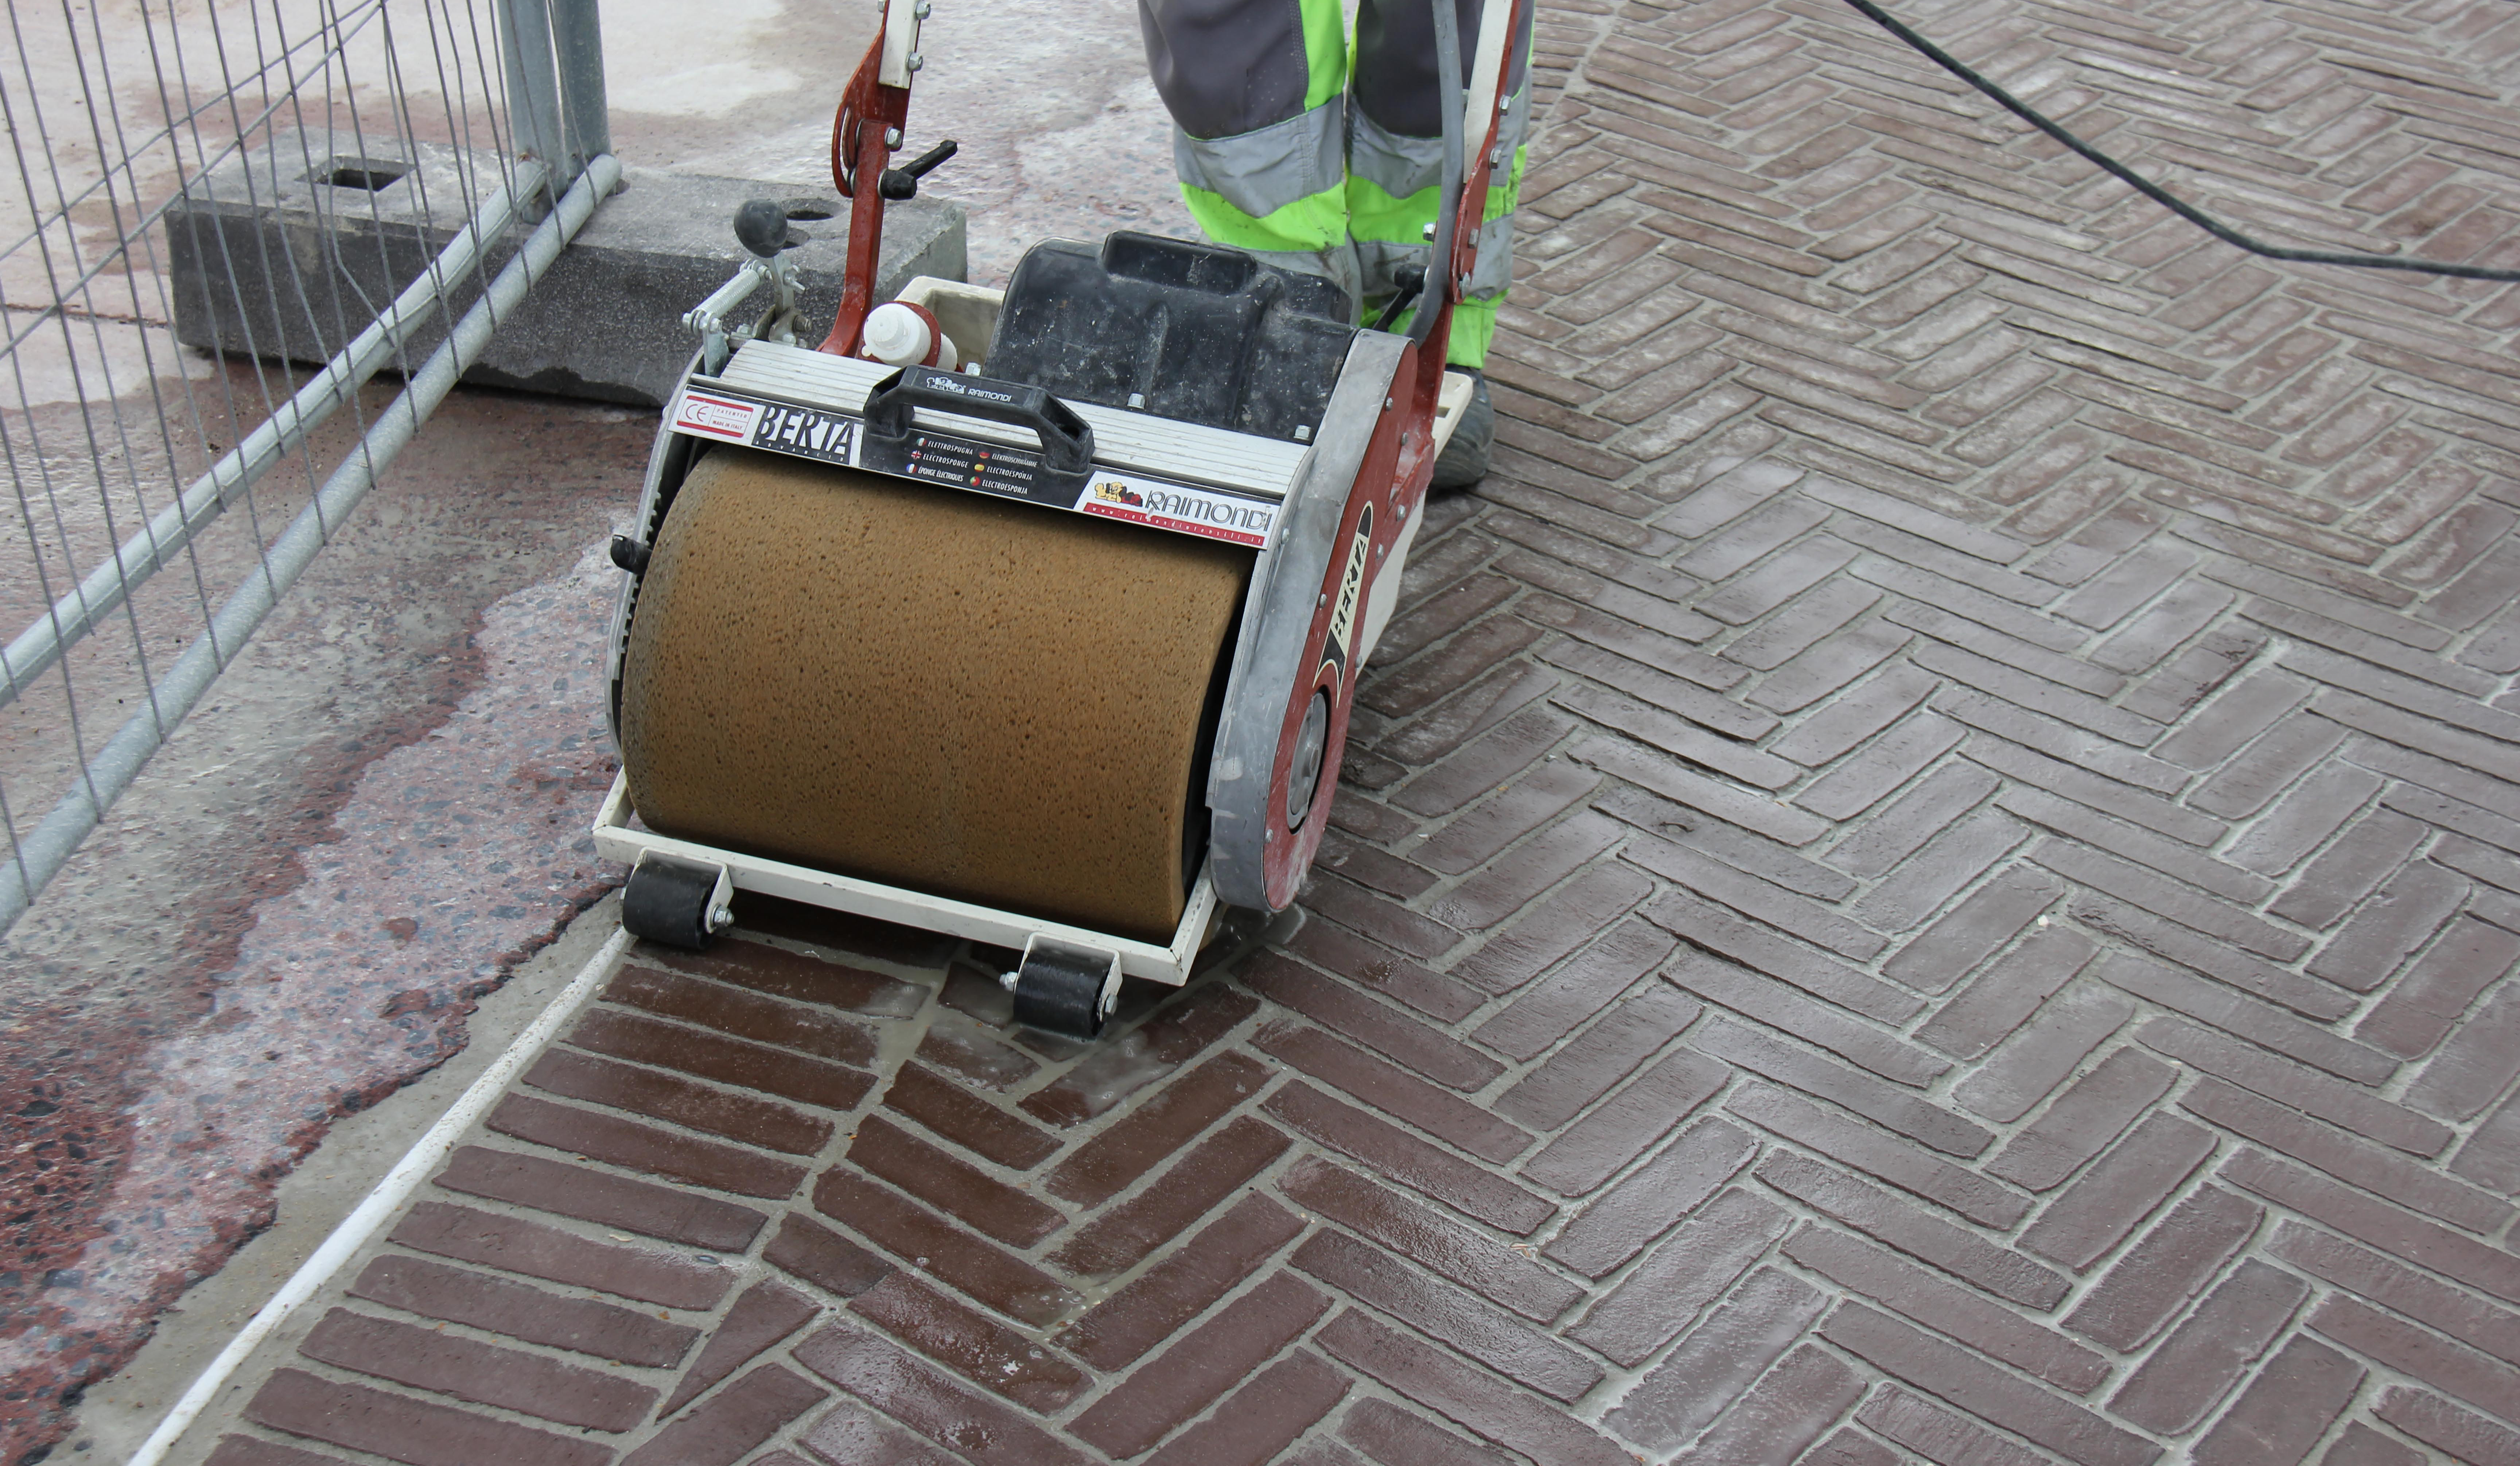
Vibration and sweeping in of split sand
During vibration, a rubber mat is placed underneath the vibration plate in order to prevent damage to the clay pavers. However if any clay pavers are damaged, they are to be replaced immediately and uneven areas are to be levelled out. When vibrating the clay pavers, you should always start from the edges and work towards the centre.
After vibration, split sand should be spread over the whole surface again and swept in. If necessary, the pavers are to be vibrated repeatedly using a light vibration plate so that the joint filling gradually falls between the clay pavers and settles there. This process should be repeated until the joints are completely filled and the clay pavers can no longer move or work loose, thus preventing the risk of distortion of the bond.
The very last embedding round, for the purpose of filling the finest joints, can be carried out using a fine neutral sand. The joint is filled right up to the top.
Commencement of use
Paved areas are not ready for use until all the pavers are firmly seated.
It is advisable to check the joint filling for the first few weeks and to fill up the joints if required.
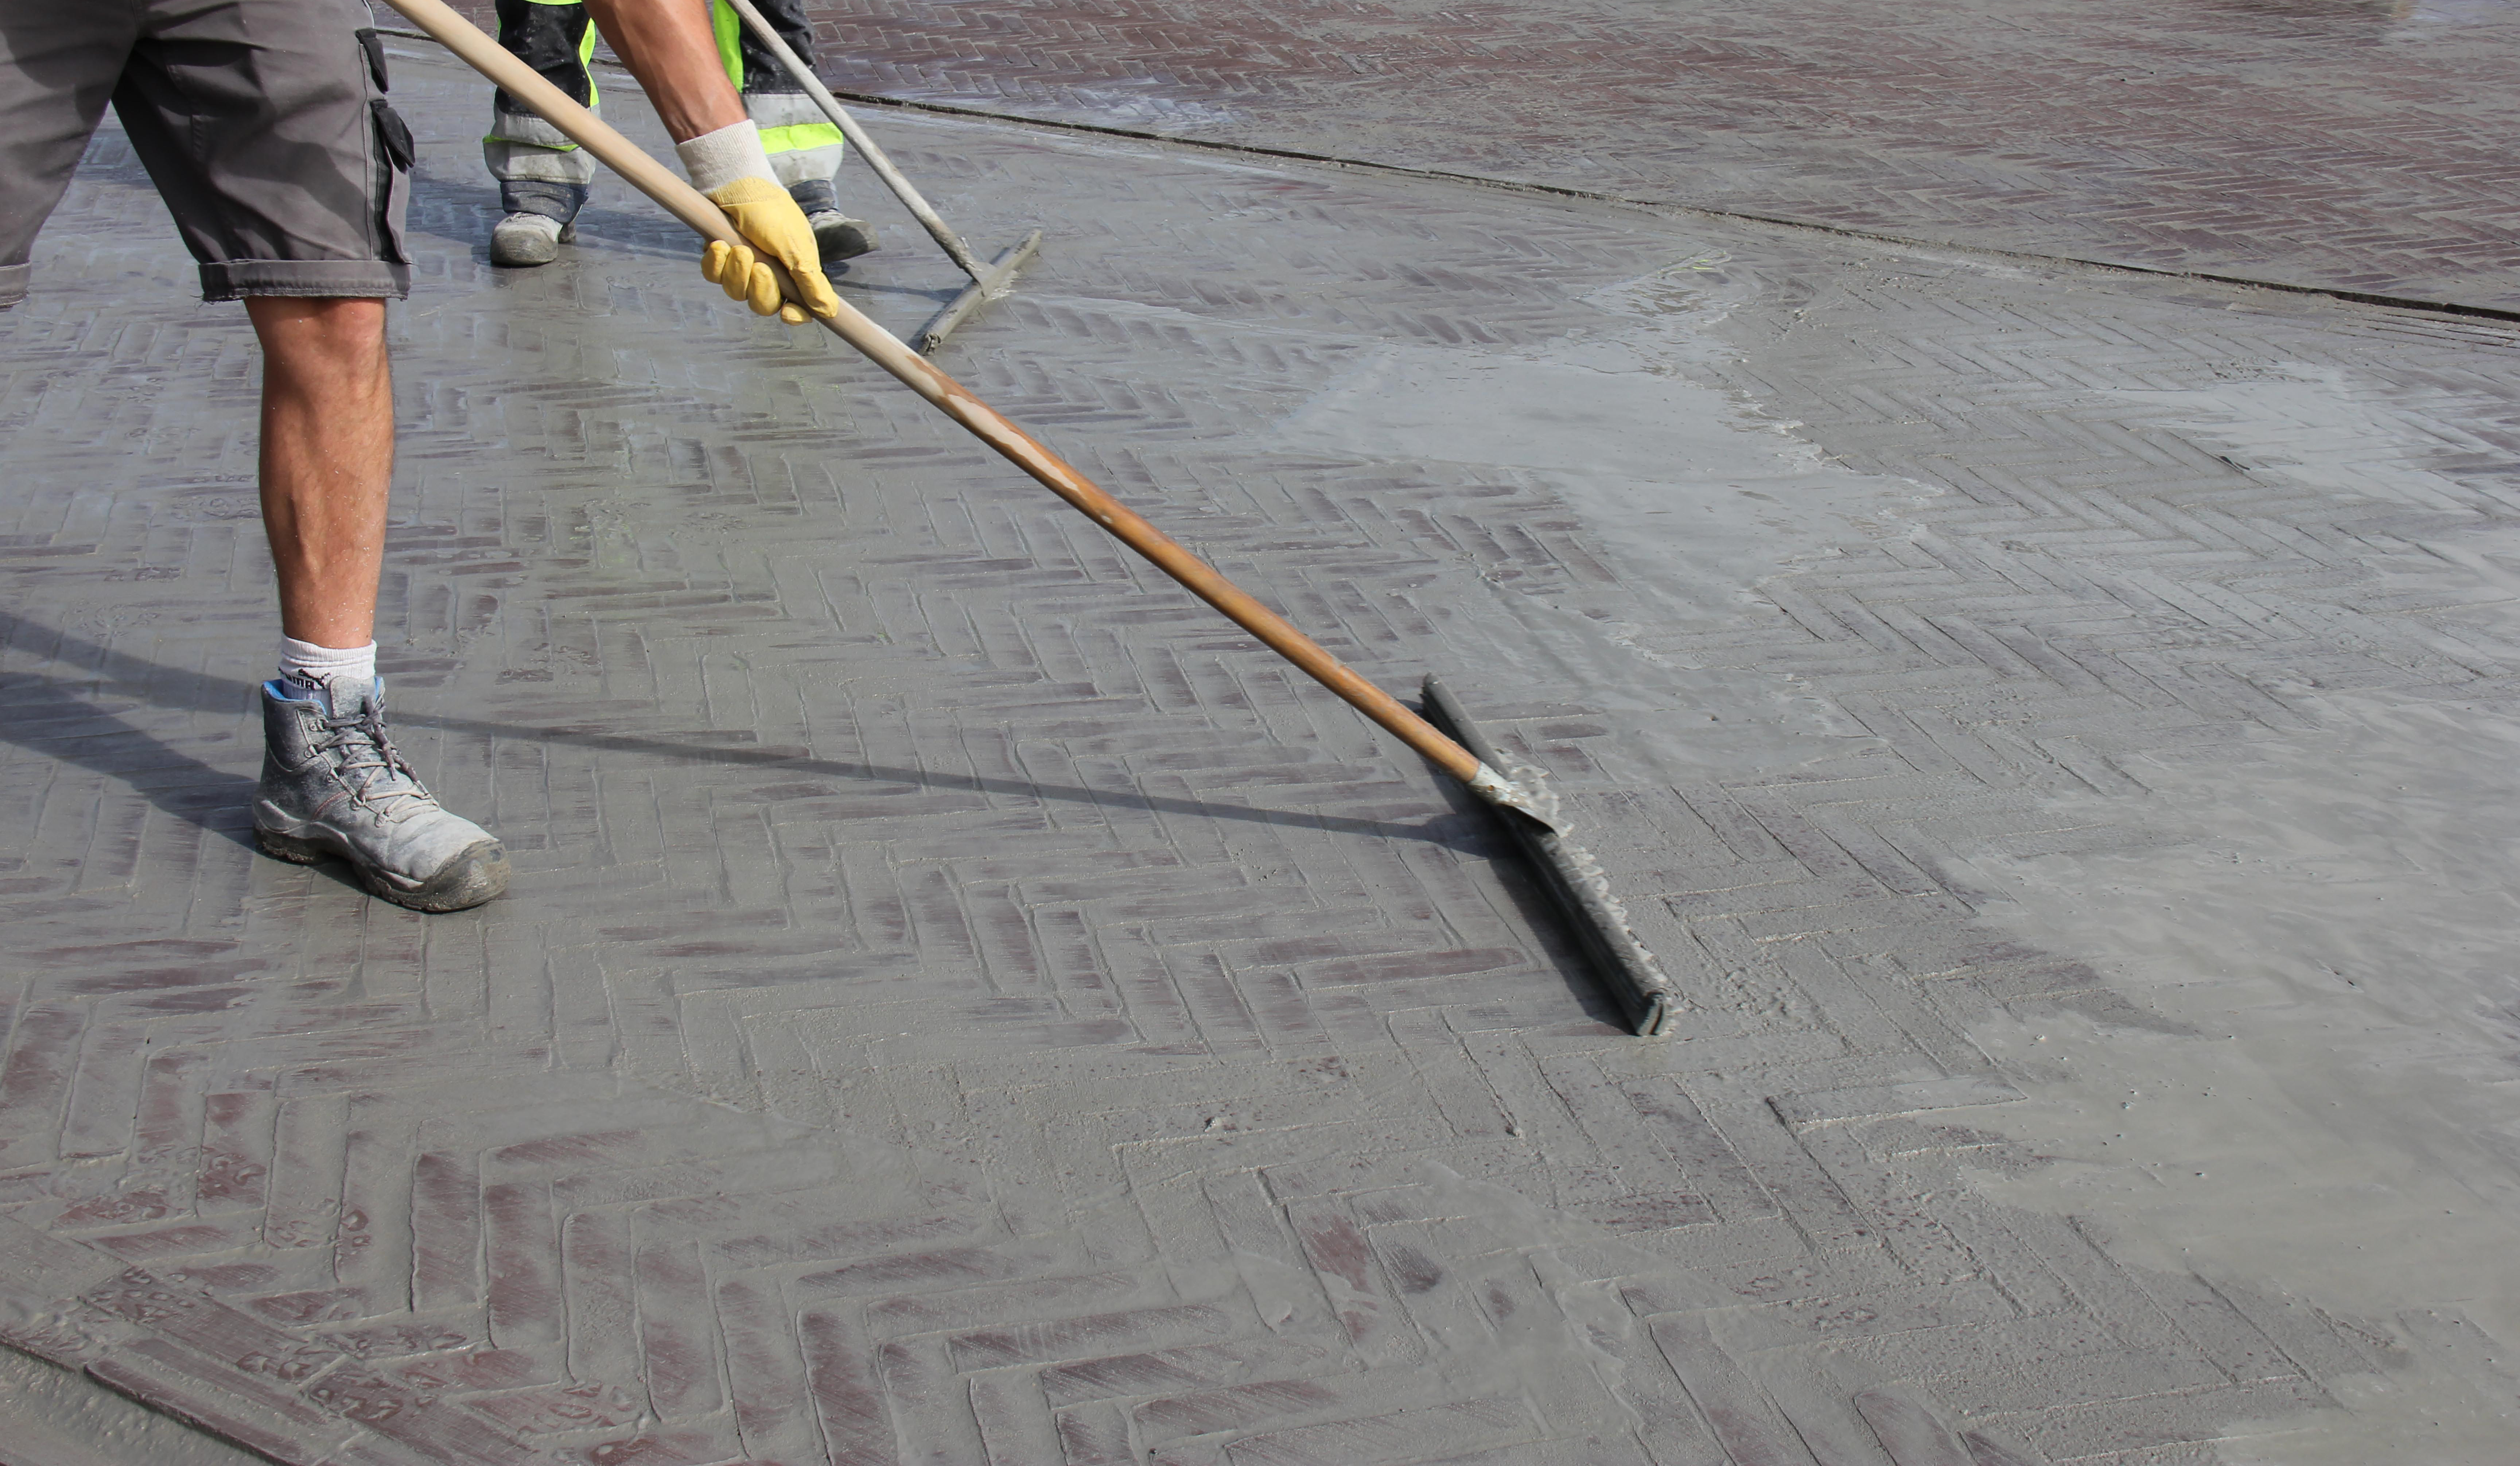
Washing-in using jointing mortar
How can I wash-in clay pavers using jointing mortar?
The washing-in of clay pavers is a technique which uses a cement-bound jointing mortar. This mortar is not water-permeable and in principle maintenance-free. There are various possibilities: self-mixed mortar using sand, cement and a bonding additive, prefabricated joint mortars that come in bags or modified mortars supplied with mixer by the concrete plant. There are various types of jointing mortar according to the desired joint colour, the expected load and joint thickness.
More detailed advice can be requested from your mortar supplier.
A cement-bound joint is used for cement-bound foundations of lean concrete or sand cement and a paving layer of sand cement. Clay pavers are usually laid with a wider joint of 5 to 10 mm in order to create sufficient strength.
A transverse slope of at least 2% is recommended for effective drainage.
Public areas
Public paved surfaces consist of?
Paved surfaces using clay pavers are ideal for the construction of public squares, roads and footpaths. Construction is organised as follows:
1. Clay pavers & joint filling
2. Bedding course
3. Foundation
4. Sub-foundation
5. Street gutter
6. Edging
7. Support
8. Geotextile
9. Roadbed
Maintenance of Clay Pavers
What is the best way to maintain Clay Pavers?
Paved surfaces constructed using clay pavers are extremely durable and require hardly any maintenance. Regular sweeping and regular cleaning with water, a diluted bleach solution (10-15%) and a scrubbing brush is usually sufficient. Then check the joint filling again and repair it where necessary.
Thanks to their extraordinary hardness, clay pavers can also be pressure-washed without any problems or risk of damage or discolouration, if necessary with the addition of environmentally-friendly cleaning agents. However, keep a sufficient distance from sanded clay pavers and avoid using a needle jet nozzle. Clay pavers are resistant to most chemical cleaning products.
After cleaning, the joint filling should be checked and repaired where necessary.